How to Create Cricut-Ready SVG Files for Stencils and Vinyl Cutting Without a Subscription
Introduction: The Subscription Trap for Cricut Makers
You found the perfect design for a stencil or vinyl decal. Now you need it as a Cricut-ready SVG file. Every option seems to cost money. Etsy files range from $5 to $15. Adobe Illustrator costs around $22.99 a month. Even “free” converters often push you toward a subscription. Fortunately, SVGMaker offers an AI converter that turns your images into true vector cut files without any subscription needed. You want one clean cut file for a mug stencil, a t-shirt, or pantry labels, and you can get it without pulling out your credit card.
If you're brand new to working with vector files, our complete beginner's guide to creating SVG files walks you through everything from understanding what an SVG is to making your first usable file.
The good news is that a cut-ready SVG isn't locked behind a paywall. It's just a vector file with clean paths that your Cricut can follow. This guide explains what makes an SVG Cricut-ready for stencils and vinyl. It provides a simple three-step workflow to turn an image into a perfect cut without a monthly fee.
Why Cricut Cuts Paths, Not Pictures
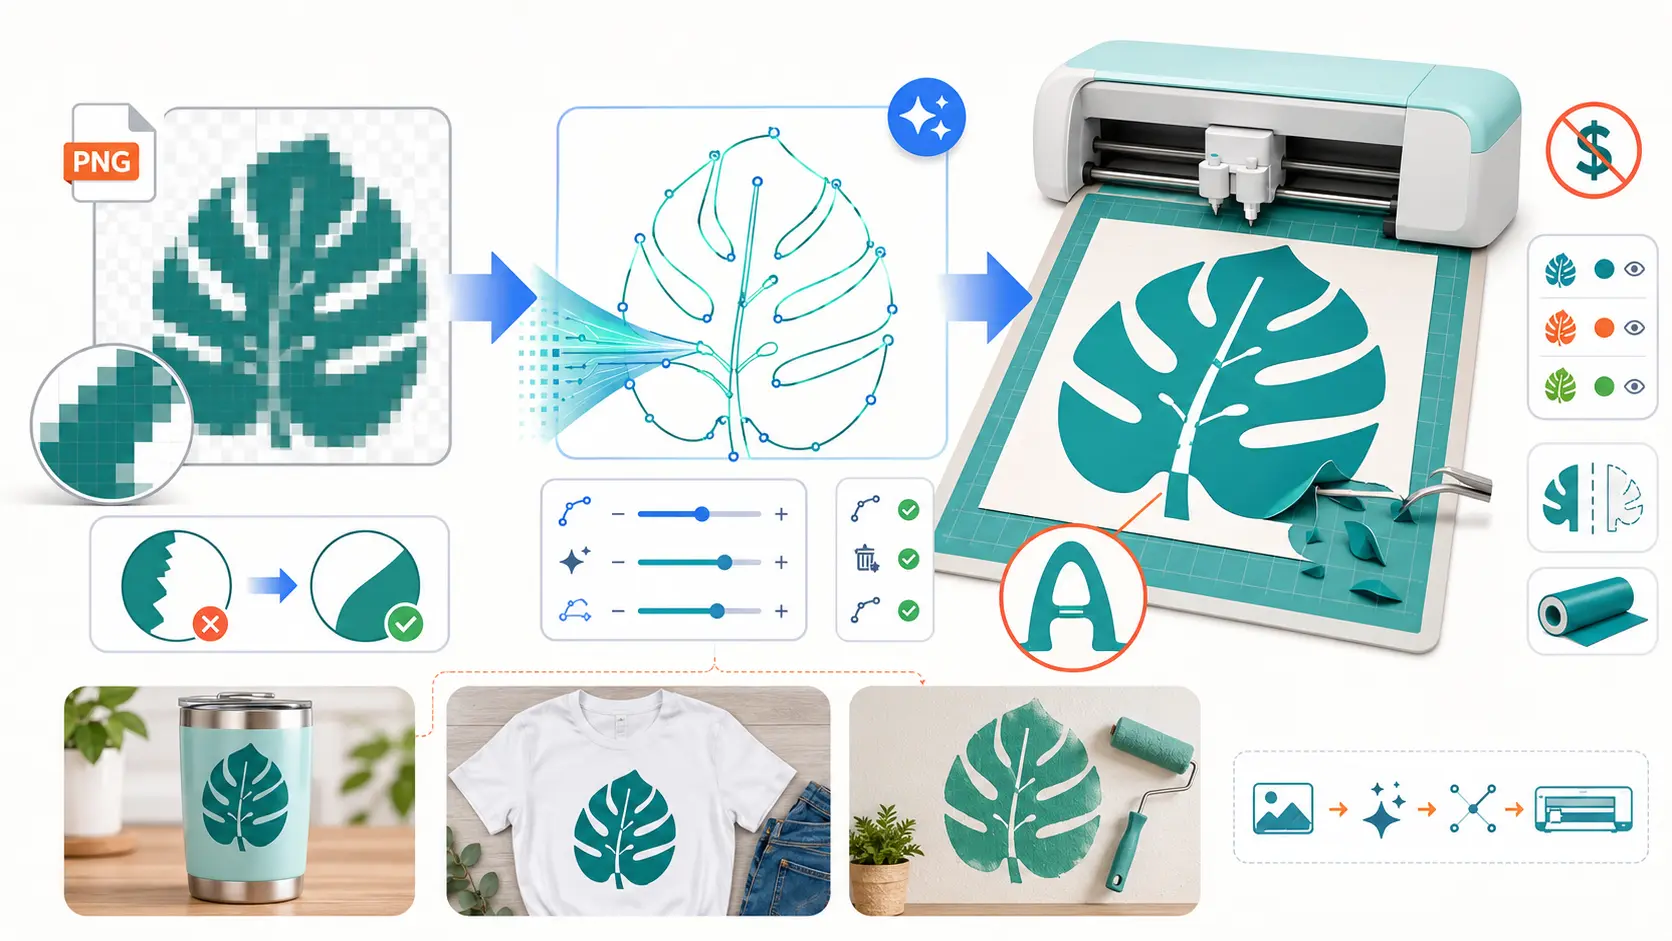
Your Cricut does not cut pictures. It follows outlines. A PNG or JPG is a raster image, which is a grid of colored pixels that lacks a built-in “cut here” path. When you upload a raster file, Design Space must guess the edges. This guessing results in jagged cuts, missing details, and problematic Print Then Cut outcomes.
An SVG stores shapes as mathematical paths. The cut outline is already in the file. It remains sharp at any size. A true, clean SVG gives your machine clear instructions. That is why converting your image to actual vector paths is the most important step.
What makes an SVG Cricut-ready for stencils and vinyl:
| Requirement | Why It Matters |
|---|---|
| Closed, clean paths | No broken fragments: the cut outline is continuous and predictable. |
| One solid color per layer | No gradients or photo data: each layer cuts as a single flat color. |
| High-contrast source | Clear separation from the background: the converter traces edges cleanly. |
| No stray specks | Tiny debris removed: the blade won't chase noise and ruin the cut. |
| Weedable detail | Lines and gaps thick enough to peel: no tearing during weeding. |
| Stencil bridges | Floating centers (like inside an "O") connected: centers stay attached, nothing falls out. |
The No-Subscription Workflow (3 Steps)
Here is the whole process. Three steps, no monthly fee, and it works the same whether you are converting an existing graphic or starting from your own artwork.
Step 1: Get Your Vector
Your first job is to turn your design into real vector paths.
Once you have the image, a logo, a clipart, or just a graphic, put it through the converter AI. The converter automatically converts a PNG, JPG, or WebP to vector paths, without the need for tracing.
For a detailed walkthrough of converting photos, logos, and other images, see our guide on how to convert any image to SVG with AI.
A few things make the conversion come out cleaner:
- Start with the highest resolution version of your image you can find. A crisp source at 300 DPI or higher traces far better than a tiny blurry thumbnail.
- Favor high contrast, simple shapes. Solid silhouettes, bold text, and clean line art convert almost perfectly. Full photographs and watercolor style art are much harder and are usually better suited to Print Then Cut than a true cut.
- Remove the background first if you can. Clearing the background before converting prevents a pile of stray paths and gives you much sharper cut lines.
If you do not have an image at all, you can also start from scratch by describing the design you want and generating an original vector, then bringing it into the same workflow.
Step 2: Clean It Up for Cutting
AI conversion gets you most of the way there, but a quick cleanup pass is what separates a decent cut from a perfect one. Open your file in the free path editor and check a few things with a live preview in front of you:
- Delete stray paths. Zoom in and remove any tiny leftover specks or dots that came from the original image.
- Remove any leftover background. If a background rectangle or shape sneaked through, delete it so only your design remains.
- Simplify busy details. Merge or smooth areas that are too fine to cut cleanly, especially thin lines and small gaps.
- Add stencil bridges. For a stencil, connect the floating centers of letters and shapes to the rest of the design so nothing falls out when you cut.
- Confirm it is one clean layer. For vinyl and stencils, flatten your design down to a single color per cut.
Because you can see the canvas update as you edit, you catch problems here at your desk instead of discovering them halfway through a ruined sheet of vinyl.
If you need to fine-tune individual paths by adjusting nodes, curves, and anchor points then our SVG path editor guide covers everything from basic edits to creating complex paths from scratch.
Step 3: Import to Cricut Design Space
Now bring your finished SVG into Cricut Design Space:
- Click Upload, select your SVG, and add it to the canvas. Because it is a real vector, it comes in as a cut file, not a flattened image.
- Ungroup the design if you need to select or recolor individual pieces.
- Mirror your design when it matters. For heat transfer vinyl (HTV) you mirror before cutting so the image reads correctly once pressed. For vinyl going on the inside of glass, mirror it too.
- Weld or attach as needed so text and layered pieces stay in the right position.
- Set your material, load your mat, and cut.
That is the entire loop. Convert, clean, cut. No subscription touched it at any point.
Stencil-Specific Tips
Stencils have one rule that trips up almost every beginner: floating centers. When you cut a letter like “O,” “A,” “B,” or “e,” the middle piece is not attached to anything. On a printed sticker that is fine. On a stencil, that center falls out and ruins the shape.
The fix is a bridge, a small connecting strip that links the floating center to the surrounding material so it stays in place. When you clean up your file in Step 2, add these bridges to any enclosed shape. Keep them thin enough to look intentional but thick enough to survive weeding and painting.
A few more stencil pointers:
- Pick the right material. Reusable stencils do well on mylar or thicker stencil film. For a quick one time stencil, adhesive vinyl or freezer paper works.
- Avoid ultra fine detail. Tiny islands and hairline gaps tear easily. Simpler, bolder designs give you crisp, reusable stencils.
- Test the layout. Before cutting, glance at the design and ask whether every enclosed area is connected. If a center is floating, bridge it.
Vinyl-Specific Tips
Vinyl is more forgiving than stencils, but a few habits keep your cuts clean and your weeding painless:
- One layer, one color. Separate your design by color and cut each color from its own sheet. A single flat color per cut is exactly what vinyl wants.
- Respect a minimum detail size. As a rule of thumb, keep individual details around a quarter inch or larger. For small lettering on HTV, aim for text at least about a third of an inch tall so it presses and peels without lifting.
- Mirror when it counts. Always mirror HTV before cutting. Mirror any vinyl meant to be viewed through glass from the other side.
- Design for easy weeding. Fewer tiny pieces means less time picking out scraps with a weeding tool. If a section is a nightmare to weed, simplify it back in the editor.
Troubleshooting Common Cricut SVG Problems
Most cut problems trace back to the source image or a skipped cleanup step. Here is how to read the symptoms.
| Problem | Likely cause | The fix |
|---|---|---|
| File uploads as Print Then Cut, not a cut | Your "SVG" has a raster image embedded inside it | Convert the original to true vector paths, then re-upload |
| Hundreds of tiny unwanted paths | A noisy or busy source image | Remove the background and delete stray specks in the editor |
| Jagged or bumpy cut lines | Low resolution source image | Start from a higher resolution version, ideally 300 DPI or more |
| Letters merge into a blob | The design is too small or too detailed | Scale the design up or simplify thin areas before cutting |
| Stencil centers fall out | Enclosed shapes have no bridges | Add bridges to floating centers during cleanup |
| Colors go missing | A multi color design got flattened | Separate colors into layers and cut each color separately |
Notice that almost every fix loops back to the same two steps: get a clean vector, then tidy it up before you cut. Nail those and most problems never appear.
Free Workflow vs Subscription Tools
The reason so many makers assume they need to pay is that the loudest options all cost money. Here is how the free workflow stacks up against the usual paid routes.
| Option | Typical cost | Cut-ready SVG? | Catch |
|---|---|---|---|
| Buying files on Etsy or Fiverr | $5 to $15 per file | Yes, usually | You pay again for every new design and cannot easily tweak it |
| Adobe Illustrator | Around $22.99 per month | Yes | Steep learning curve and a recurring bill |
| Paid converter plans | Monthly or yearly fee | Yes | Recurring cost for something you may use occasionally |
| Convert plus a free editor | Free | Yes | You do the quick cleanup yourself, which takes minutes |
For an occasional maker, the math is clear. A free convert and cleanup workflow gives you the same cut-ready result without a card on file.
Frequently Asked Questions
1. Do I need Cricut Access or any paid plan to use my own SVG files?
No. Uploading and cutting your own SVG files in Cricut Design Space is free. Cricut Access is a separate library of their images and fonts. If you bring your own cut-ready SVG, you can skip it entirely.
2. Can I just upload a PNG or JPG straight into Design Space instead?
You can, but you usually should not for stencils and vinyl. Raster files force the machine to guess your edges, which leads to jagged cuts and dropped detail. Converting to a true SVG first gives you exact, clean cut paths.
3. How do I add stencil bridges so the letter centers do not fall out?
Open your file in an editor and connect each floating center (like the middle of an “O” or “A”) to the surrounding design with a small strip. Keep the bridge thin but sturdy. Do this during the cleanup step, before you upload to Design Space.
4. Will this work with a Silhouette machine too?
Yes. A clean SVG is a standard vector file, so the same cut-ready file works in Silhouette Studio and other cutting software, not just Cricut Design Space.
5. Is the converted SVG really free to use for things I sell?
The tools are free to use, but you are still responsible for the design itself. Only convert and cut artwork you created or have the rights to use. Grabbing a copyrighted logo or illustration does not become legal just because you vectorized it.
6. My design looks great on screen but cuts badly. Why?
Usually the source was too small, too detailed, or too noisy. Start from a higher resolution image, remove stray specks, and simplify thin lines in the editor. Screens hide problems that a blade will find.
7. How do I keep the centers of letters when cutting a stencil?
That is exactly what bridges are for. Without them, enclosed centers are disconnected and drop out. Add bridges to every enclosed shape during cleanup so the centers stay attached to the rest of the stencil.
8. What is the easiest design to start with?
A bold, high contrast, single color design. Solid silhouettes, simple icons, and chunky text convert cleanly and cut beautifully. Save the photographs and fine watercolor art for Print Then Cut projects.
Conclusion
A Cricut-ready SVG is not a premium product you have to rent. It is just a clean vector file with paths your machine can follow, and you can make one for free in three steps: convert your image to true vector paths, clean it up for cutting, and import it into Design Space.
Once you have that workflow, the subscription trap disappears. You are no longer buying a new file every time inspiration strikes or paying monthly for software you open twice a month. You convert what you have, tidy it in a free editor, add stencil bridges where you need them, and cut. Whether it is a reusable stencil, a batch of vinyl labels, or a shirt design, the path from idea to clean cut stays free, fast, and fully in your hands.