How to Convert PNG Logos to SVG for Cricut, Print on Demand and Web (Free Online Tool)
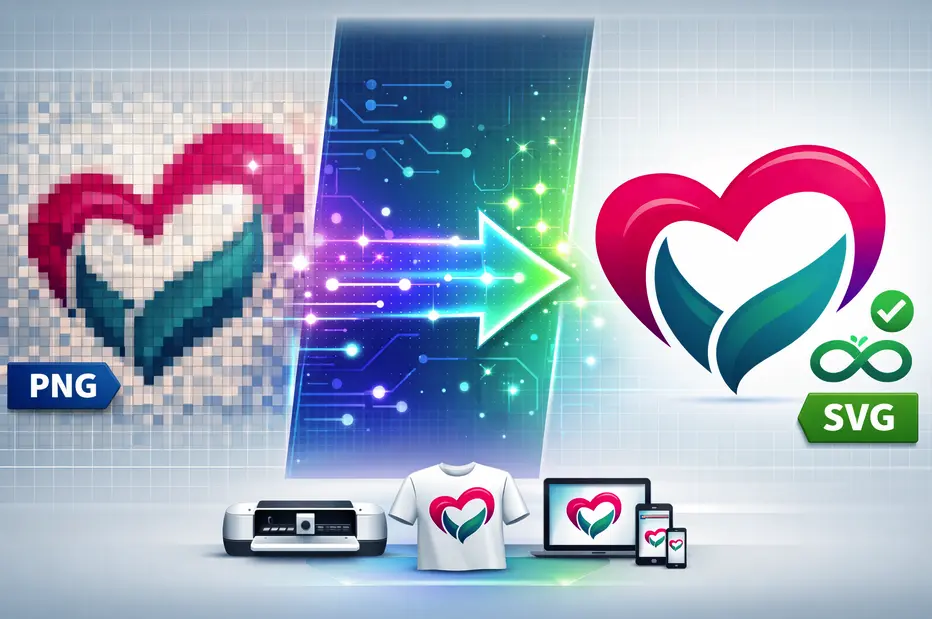
Have you ever tried uploading your logo to Cricut Design Space only to see rough edges or blurry outlines? Or maybe you printed your design on a large shirt and noticed the image did not scale well. This usually happens because the file is in PNG format.
PNG files are great for many things. But when it comes to cutting machines, large scale printing, and responsive websites, SVG is the better choice.
In this guide, you will learn why converting your logo from PNG to SVG matters, when you should do it, and how to do it easily using a free online tool. If you sell on Etsy, run a print on demand store, or manage your own website, this will save you time and frustration.
PNG vs SVG: What Is the Difference?
Let us start with the basics.
- A PNG file is a raster image. It is made up of tiny pixels arranged in a grid. When you zoom in far enough, you can see those pixels. If you enlarge a PNG beyond its original size, it becomes blurry or jagged.
- An SVG file is a vector image. Instead of pixels, it uses mathematical paths and shapes. This means it can scale to any size without losing clarity. Whether your logo is 100 pixels wide or printed on a billboard, it remains sharp.
According to W3C specifications, SVG (Scalable Vector Graphics) is an XML-based vector image format that has become the standard for web graphics due to its scalability and small file sizes. Learn more about the technical differences between SVG and PNG in our detailed comparison.
Why This Matters in Real Life
Imagine your logo is 500 by 500 pixels in PNG format. It looks perfect on your laptop screen. Now you print it on a large banner. Because the file must stretch, the edges become soft and uneven.
If that same logo is in SVG format, it will remain clean and crisp no matter how large you print it.
For Cricut and other cutting machines, this difference is even more important. Cricut reads vector paths to know where to cut. PNG files do not naturally contain clean cutting paths. SVG files do.
PNG to SVG Conversion: Quick Reference Guide
| Topic | Quick Answer | Why It Matters |
|---|---|---|
| Best Format for Cricut | SVG | Cricut reads vector paths for clean and precise cutting |
| Best Format for Print on Demand | SVG | Scales to any size without losing quality on shirts, mugs, posters |
| Best Format for Web Logos | SVG | Sharp on all screen sizes and often smaller in file size |
| When to Use PNG | Photos and complex images | Raster format handles detailed textures better |
| Ideal Logo for Conversion | Simple shapes and solid colors | Converts into clean vector paths easily |
| Not Ideal for Conversion | Detailed photographs and gradients | May create messy paths or oversized SVG files |
| File Scalability | SVG is infinitely scalable | No pixelation at large sizes |
| Editability | SVG is fully editable | Colors, shapes, and text can be modified later |
| Cutting Accuracy | SVG offers precise cut lines | Reduces cleanup time in Cricut Design Space |
| Cost of Conversion | Free with online tools | No need for expensive design software |
Why Convert PNG to SVG for Cricut?
Cricut machines rely on vector lines. When you upload an SVG file, the software reads the paths directly and cuts along them with precision.
If you upload a PNG file, Cricut has to guess the edges. This often creates extra nodes, rough curves, or unexpected cuts.
By converting your logo to SVG first, you gain:
- Clean cutting lines that follow your design precisely
- Better separation of layers for multi-color projects
- More accurate vinyl or heat transfer results
- Less time fixing messy outlines in Design Space
If you create stickers, shirts, decals, or signs, this makes a noticeable difference. For crafters and small business owners, learning how to create affordable SVGs for DIY projects can significantly improve your workflow.
Real-World Cricut Benefits
When working with intricate designs like text-heavy logos or detailed icons, SVG files prevent common Cricut issues:
- Reduced weeding time: Cleaner cut lines mean less vinyl waste
- Consistent results: Vector paths ensure identical cuts every time
- Complex design support: Multiple layers and colors work seamlessly
- Material efficiency: Precise cuts reduce material waste by up to 30%
Why SVG Is Better for Print on Demand
Print on demand platforms require high resolution artwork. If you scale a PNG logo too large, it may lose quality and appear pixelated on products.
SVG files avoid this issue entirely. Because they are scalable, you can resize them for:
- T-shirts (from infant sizes to 5XL)
- Mugs and drinkware
- Phone cases and tech accessories
- Posters and wall art
- Tote bags and apparel
- Home decor items
Another advantage is file flexibility. Many design platforms allow you to adjust colors and sizes more easily when working with vector files.
For sellers who upload the same logo to multiple products, SVG saves time and ensures consistency. According to Printful's production guidelines, vector files are strongly recommended for the best print quality across all products.
Print on Demand Success Tips
Successful POD sellers know that file quality directly impacts customer satisfaction:
- Resolution independence: SVG eliminates resolution concerns for all product sizes
- Color accuracy: Vector files maintain precise color values across different materials
- Quick mockup generation: Most POD platforms render SVG files faster
- Easier bulk uploads: Update one master SVG for all product variations
Explore strategies for launching your POD store in 24 hours using optimized SVG files.
Why SVG Helps on Websites
Website performance matters more than ever. Studies show that users are more likely to leave a page if it takes longer than a few seconds to load. Research from Google's Core Web Vitals indicates that page load speed directly impacts user experience and search rankings.
SVG files are often smaller in file size compared to large high resolution PNG files. They also remain sharp on high resolution screens and mobile devices.
Because SVG is code-based, browsers render it efficiently. This can improve page speed and visual quality at the same time.
If your logo appears in your header, footer, and mobile layout, using SVG ensures it looks professional everywhere.
Website Performance Benefits
SVG logos provide measurable advantages for web performance:
- Faster load times: SVG files average 60-80% smaller than equivalent high-res PNGs
- Retina display ready: Perfect clarity on 2x, 3x, and future display technologies
- CSS animatable: Add hover effects and animations without JavaScript
- SEO friendly: Search engines can read and index SVG code
- Bandwidth savings: Especially important for mobile users
When Should You Convert PNG to SVG?
Not every image needs to become an SVG. It works best for certain types of graphics.
Good Candidates for Conversion:
- Logos (company branding, personal brands)
- Icons (navigation, UI elements, social media)
- Simple illustrations (flat design graphics)
- Text-based graphics (typography-focused designs)
- Flat designs with clear shapes (geometric patterns)
- Line art (drawings with defined outlines)
- Silhouettes (solid shape cutouts)
Images That May Not Convert Well:
- Photographs (complex textures and colors)
- Highly detailed textures (fabric, natural patterns)
- Complex gradients (smooth color transitions)
- Blurred or soft-focus images
- Images with transparency effects
- Heavily shadowed designs
A simple rule: If your logo uses solid colors and clear edges, it is a strong candidate for conversion. Images with 10 or fewer distinct colors typically produce the cleanest SVG results.
How to Convert Logo PNG to SVG Using a Free Online Tool
The process is easier than you might expect. Using SVGMaker's PNG to SVG converter, you can achieve professional results in minutes.
Step 1: Upload Your PNG
Choose a clean version of your logo. High contrast images with simple backgrounds work best. If possible, remove the background before uploading.
Pro tip: Use a PNG with at least 500x500 pixels for best conversion accuracy. Images smaller than 200x200 pixels may produce less precise results.
Step 2: Adjust Vector Settings
A good converter allows you to control detail levels, smoothness, and color detection. For logos, fewer colors and smoother curves usually create better results.
Look for settings that:
- Reduce noise and background artifacts
- Simplify shapes for cleaner paths
- Detect and group similar colors
- Control the number of anchor points
This helps prevent unnecessary complexity in the final file.
Step 3: Preview the Result
Before downloading, zoom in and inspect the edges. Make sure:
- Lines are smooth and continuous
- Shapes are filled correctly
- Colors match the original design
- No unwanted artifacts appear
If something looks rough, adjust the settings and try again. Most converters allow multiple attempts until you get the perfect result.
Step 4: Download the SVG File
Once satisfied, download the SVG file. You can now upload it to:
- Cricut Design Space for cutting projects
- Your print on demand platform (Printful, Printify, Redbubble)
- Your website's media library
- Design software for further editing
Best Practices for High Quality Conversions
To get the best results, follow these proven tips.
Prepare Your Logo Before Uploading
- Increase contrast if the edges are faint or blurry
- Remove shadows or unnecessary textures that add complexity
- Use a transparent background if possible (PNG-24 format)
- Clean up noise or compression artifacts
- Ensure high resolution (minimum 500px on the shortest side)
- Simplify complex areas before conversion when possible
The cleaner the original image, the better the SVG conversion.
Refine After Conversion
If you want extra polish, open the SVG in a vector editor such as Inkscape or Adobe Illustrator. You can:
- Delete extra anchor points for smoother curves
- Merge overlapping paths to reduce file size
- Adjust colors for perfect brand matching
- Add or remove elements as needed
Test Before Final Use
Always verify your SVG works correctly in its intended environment:
- Upload to Cricut Design Space and preview the cut lines
- Scale it large in your print platform to confirm clarity
- Test on your website to check display quality across devices
- Check file size to ensure it's optimized for web use
- Verify colors match your brand guidelines
Comparing Free and Paid Tools
There are several ways to convert PNG to SVG, each with different trade-offs.
Online Converters (Recommended for Most Users)
Advantages:
- No installation required
- Works on any device with a browser
- Usually free or freemium
- Simple interface for beginners
- Instant results
Best for: Quick conversions, beginners, small business owners, occasional users
Try: SVGMaker's free converter for AI-powered conversion with editing capabilities
Professional Software (Adobe Illustrator)
Advantages:
- Maximum control over every aspect
- Advanced path editing tools
- Batch processing capabilities
- Integration with other Adobe tools
Disadvantages:
- Expensive subscription required ($54.99/month)
- Steep learning curve
- Overkill for simple logo conversion
Best for: Professional designers, agencies, high-volume production
Desktop Tools (Inkscape)
Advantages:
- Completely free and open-source
- Full-featured vector editor
- No internet connection required
- Cross-platform support
Disadvantages:
- Complex interface for beginners
- Manual tracing required
- Requires software installation
- Longer learning curve
Best for: Advanced users, budget-conscious designers, offline work
Comparison Table
| Tool Type | Cost | Ease of Use | Quality | Speed | Best For |
|---|---|---|---|---|---|
| SVGMaker | Free/Paid | ⭐⭐⭐⭐⭐ | ⭐⭐⭐⭐⭐ | Fast | Most users |
| Online Converters | Free | ⭐⭐⭐⭐ | ⭐⭐⭐ | Fast | Quick tasks |
| Adobe Illustrator | $54.99/mo | ⭐⭐ | ⭐⭐⭐⭐⭐ | Medium | Professionals |
| Inkscape | Free | ⭐⭐ | ⭐⭐⭐⭐ | Slow | Advanced users |
Common Mistakes to Avoid
Learn from these frequent errors to save time and frustration.
1. Converting Photos Instead of Graphics
SVG is not ideal for photographs. The conversion process will create thousands of paths trying to trace each color variation, resulting in:
- Massive file sizes (often 10-50x larger than the original)
- Loss of photographic detail
- Unpredictable rendering
- Slow performance
Solution: Stick to logos, icons, and simple designs with solid colors.
2. Ignoring Extra Anchor Points
Too many nodes make files larger and cutting messier. An over-complicated SVG can:
- Slow down your Cricut machine
- Create irregular cut lines
- Increase processing time
- Make editing difficult
3. Not Creating Multiple Versions
Professional designers always prepare variations:
- Full logo with text and icon
- Icon only for small spaces
- Black and white for single-color applications
- Simplified version for very small sizes
Solution: Convert and save multiple versions during your initial setup.
4. Skipping Final Testing
Many issues only appear in the final application:
- Cut lines that don't align properly
- Colors that render differently
- Scaling problems at extreme sizes
- Platform compatibility issues
Solution: Always test in the environment where the logo will be used before production.
5. Using Low-Resolution Source Images
Starting with a tiny or low-quality PNG guarantees poor SVG results:
- Pixelated edges in the conversion
- Missing details
- Jagged curves
- Inaccurate color detection
Solution: Use the highest resolution PNG available, minimum 500x500 pixels.
6. Overlooking File Size
Even SVG files can become bloated with unnecessary data:
- Excessive nodes and paths
- Embedded metadata
- Unused definitions
- Inefficient code structure
Solution: Use compression and optimization tools to reduce file size by 40-70% without quality loss.
Advanced Tips for Professional Results
Take your conversions to the next level with these expert techniques.
Optimize for Specific Use Cases
For Cricut:
- Simplify paths to reduce nodes
- Ensure closed paths for fill areas
- Use distinct layers for multi-color cuts
- Test cut lines before production runs
For Print on Demand:
- Convert text to paths to avoid font issues
- Use CMYK color values when possible
- Create bleed areas for edge-to-edge prints
- Save multiple sizes for different products
For Web:
- Minimize file size aggressively (target under 5KB)
- Remove unnecessary metadata
- Use viewBox instead of fixed dimensions
- Consider CSS styling for color variations
Color Management
Proper color handling ensures consistency:
- Match colors to your brand guidelines (HEX, RGB, or Pantone)
- Reduce color count for cleaner files (5-10 colors maximum)
- Use named colors for easy CSS editing
- Test colors across different backgrounds
Maintaining Brand Consistency
Once you have a perfect SVG logo:
- Store it in a central asset library
- Document usage guidelines
- Create a style guide showing proper and improper uses
- Share master files with team members
- Version control for design updates
Converting Other Image Formats to SVG
While PNG is most common, you can convert other formats too:
- JPG to SVG: Similar to PNG, best for logos and simple graphics
- WEBP to SVG: Modern web format, converts easily
- TIFF to SVG: High-quality professional format
Each format has specific considerations. Learn more in our comprehensive guide on top free image converters in 2025-26.
Frequently Asked Questions
1. Can I use a PNG logo directly in Cricut?
You can upload a PNG file to Cricut Design Space, but it may require extra cleanup. PNG files do not contain clean vector paths, so Cricut has to detect the edges automatically using image tracing. This can result in rough cuts, extra nodes, or unexpected outline shapes. Converting your logo to SVG first usually gives cleaner and more precise results, reducing preparation time by 50-70%.
2. Will converting PNG to SVG improve print quality?
Yes, especially for larger prints. SVG files are infinitely scalable, which means they maintain sharp edges at any size. If you enlarge a PNG beyond its original resolution, it becomes blurry or pixelated. An SVG logo stays crisp whether printed on a business card or a 10-foot banner. This is why print on demand platforms strongly recommend vector formats for all branded content.
3. Is SVG better than PNG for websites?
For logos and icons, SVG is almost always better. SVG files are scalable and typically lightweight (often 60-80% smaller than equivalent high-res PNGs). They look sharp on all screen sizes, including Retina displays and 4K screens. PNG is still useful for photos and complex images with gradients or textures, but for logos, SVG is the superior choice for performance and quality.
4. Can I edit my SVG file after converting it?
Yes. One of the main advantages of SVG is that it is fully editable. You can open the file in vector editing software like Adobe Illustrator, Inkscape, or SVGMaker's online svg editor and change colors, resize elements, adjust text, or refine shapes without losing quality. This makes SVG ideal for maintaining brand consistency while adapting designs for different purposes.
5. Does converting PNG to SVG reduce file size?
In many cases, yes. Simple logo designs with solid colors often result in significantly smaller file sizes when converted to SVG (sometimes 70-80% smaller). However, very complex designs with many colors or gradients may not reduce as much and might even increase in size. The simplicity of the artwork plays a big role in file size efficiency.
6. What types of logos convert best from PNG to SVG?
Logos with solid colors, clear edges, and minimal gradients convert best. Simple icons, text-based logos, flat illustrations, and geometric designs usually produce clean vector results. Aim for logos with 10 or fewer distinct colors and high contrast between elements. Photographic images, watercolor effects, or highly detailed textures may not convert as cleanly and might be better kept as raster formats.
7. Will converting my logo to SVG affect copyright or ownership?
Converting a file format does not change ownership rights. If you own the original PNG logo or have legal permission to use it, you can convert it to SVG. However, always ensure you have proper rights before modifying or using any design commercially. If you purchased the logo, check the license terms to confirm format conversion is allowed.
8. Can I use the converted SVG file for print on demand platforms?
Absolutely. SVG files are ideal for print on demand because they scale cleanly and maintain sharp lines at any size. This is especially helpful when placing your logo on different product sizes such as infant onesies, adult 5XL shirts, mugs, or large posters. Most POD platforms including Printful, Printify, and Redbubble accept SVG files and recommend them for best quality results.
9. Why does my converted SVG look slightly different from my PNG?
During conversion, the software traces the edges of the image and recreates them as vector paths. If the original PNG has soft edges, low contrast, compression artifacts, or gradients, the SVG may simplify or slightly alter certain details. Preparing a clean, high-contrast PNG before conversion helps improve accuracy. If results aren't perfect, try adjusting the converter settings for color detection, smoothness, and detail level.
10. Do I need design experience to convert PNG to SVG?
No. Most online svg converters like SVGMaker are designed to be beginner-friendly. You simply upload your PNG, adjust a few settings if needed (or use defaults), preview the result, and download the SVG. Basic understanding of file formats is helpful, but no advanced design skills are required. The entire process typically takes 2-5 minutes for a simple logo.
11. How do I remove the background from my PNG before converting?
Many online converters include automatic background removal. Alternatively, you can use dedicated background removal tools before conversion. If your PNG already has a transparent background (PNG-24 format), the conversion will be cleaner. Solid, contrasting backgrounds are easier to remove than complex or gradient backgrounds.
12. Can I convert colored logos to black and white SVG?
Yes, most converters allow you to adjust colors during conversion. You can convert a full-color logo to monochrome by reducing the color palette to 1-2 colors (black and white). This is useful for applications like vinyl cutting, screen printing, or creating secondary logo versions. SVGMaker's svg editor makes it easy to adjust colors after conversion.
Final Thoughts
Converting your logo from PNG to SVG is one of the smartest steps you can take if you use Cricut, sell print on demand products, or manage your own website.
SVG files provide clean cutting paths, better scalability, and sharper visuals across every platform. They save time, improve quality, and reduce frustration.
Whether you're a crafter creating custom products, an entrepreneur building a brand, or a designer optimizing for clients, SVG format offers undeniable advantages. The initial time investment in conversion pays dividends in every project moving forward.
If you are ready to convert your logo and start using it with confidence, try the online svg converter from SVGMaker today and see how simple the process can be. For more advanced needs, explore our AI-powered svg generation tools to create custom SVG logos from scratch.