How to Make SVG Files for Cricut: Complete 2026 Guide (Free Generator + Tutorial)
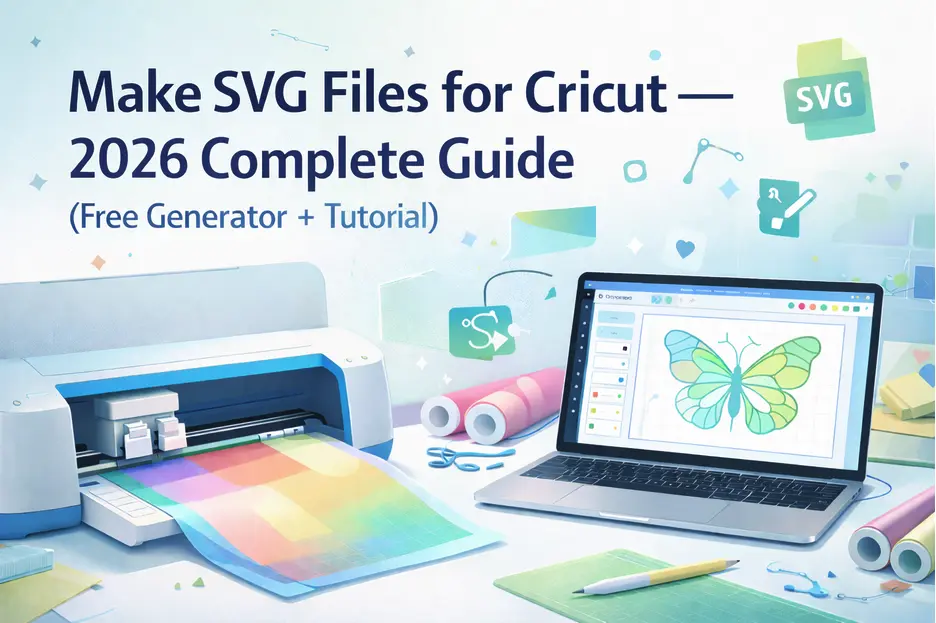
Creating custom SVG files for your Cricut machine unlocks endless possibilities for personalized crafts, from vinyl decals to iron-on transfers. Whether you're a beginner or looking to streamline your design process, this guide will walk you through everything you need to know about making professional SVG files in 2026.
What Are SVG Files and Why Do Cricut Users Need Them?
SVG (Scalable Vector Graphics) files are vector-based images that maintain perfect quality at any size. Unlike JPEGs or PNGs that become pixelated when enlarged, SVGs use mathematical formulas to define shapes, making them ideal for cutting machines.
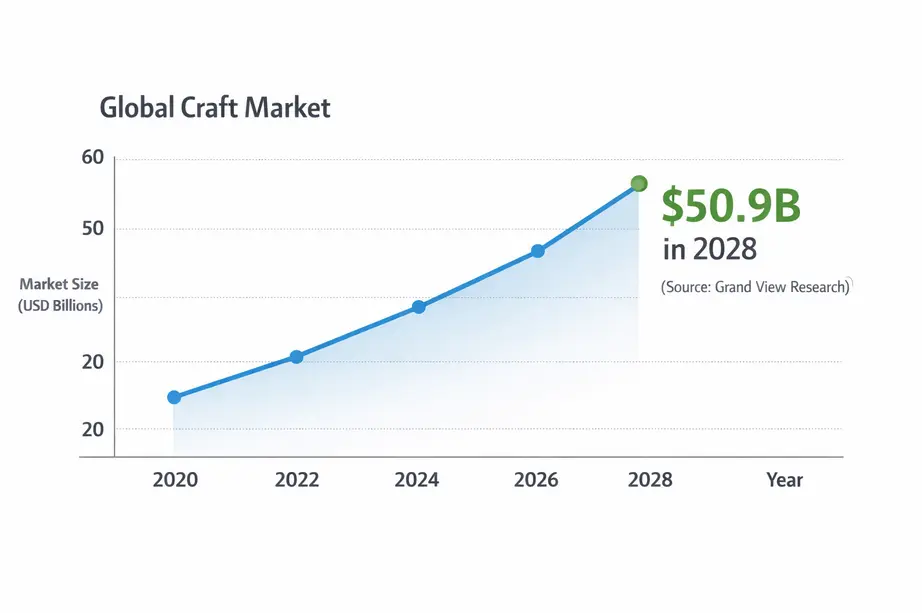
For Cricut users, SVG files are essential because they contain cutting paths that tell your machine exactly where to cut. The Cricut cutting machine market has grown significantly, with the global craft market projected to reach $50.9 billion by 2028 according to Grand View Research, driven largely by DIY enthusiasts seeking custom designs and personalized creations.
Key benefits of using SVG files:
- Scale to any size without quality loss
- Smaller file sizes compared to raster images (learn more about SVG vs PNG differences)
- Editable colors and shapes
- Compatible with all Cricut models (Maker, Explore, Joy)
- Perfect for layered designs
Understanding SVG File Requirements for Cricut
Before creating your SVG, you need to understand what makes a file Cricut-compatible:
| Requirement | Details |
|---|---|
| File Format | .svg extension |
| Color Mode | RGB (for screen display) |
| Layers | Separate layers for different colors/materials |
| Paths | Closed paths for clean cuts |
| Complexity | Simplified designs cut more accurately |
| Size Limitations | Max 11.5" x 23.5" (Maker 3), 12" x 24" (Maker) |
Method 1: Using Free Online SVG Generators (Fastest Method)
For beginners or anyone seeking quick results, online SVG generators like SVGMaker.io offer the fastest path to Cricut-ready files. According to Statista, the average consumer now expects tools to be intuitive and instant, online generators meet this demand perfectly.
Step-by-Step Tutorial Using SVGMaker.io
Step 1: Access the Tool Navigate to SVGMaker.io in your browser. No account creation or software download required, simply start creating immediately.
Step 2: Choose Your Creation Method
- Upload an existing image to convert to SVG
- Use built-in shapes and text tools
- Import vector elements from the design library
Step 3: Design Your SVG
- Add text with Cricut-friendly fonts
- Combine shapes and elements
- Adjust colors for different layers (each color = one cut/material)
- Use the alignment tools for precise positioning
Step 4: Optimize for Cricut
- Simplify complex paths using the "Simplify" feature
- Ensure all paths are closed
- Remove any overlapping elements
- Check that layers are properly separated (learn advanced techniques in the SVG optimization guide)
Step 5: Export Your File
- Click "Download SVG"
- Save to your computer
- Upload directly to Cricut Design Space
Pro Tip: SVGMaker.io automatically optimizes files for cutting machines, removing unnecessary nodes and ensuring clean cut lines, a process that takes hours in professional software like Adobe Illustrator.
Method 2: Converting Images to SVG (For Photos and Graphics)
If you have an existing image you want to cut with your Cricut, conversion is your best option. Whether you're working with a PNG, JPG, or WEBP file, modern converters handle all major formats.
Best practices for image conversion:
- Start with high-resolution images (300 DPI minimum)
- Choose images with clear contrast and defined edges
- Remove backgrounds before conversion for cleaner results (try the smart background removal feature)
- Simplify complex designs—remember that your Cricut has to physically cut every line
Most online SVG generators include image-to-SVG conversion tools. The AI-powered tracing in tools like SVGMaker.io has improved dramatically in 2026, with accuracy rates exceeding 95% for clear, high-contrast images. Research from MIT shows AI image recognition technology has reached near-human levels of accuracy, making automated conversions more reliable than ever.
Method 3: Creating SVG Files from Scratch (Advanced)
For complete creative control, you can design original SVGs using vector software. Adobe's 2025 Creative Cloud report shows that 73% of professional designers still prefer desktop software for complex vector work.
Recommended software options:
| Software | Cost | Best For | Learning Curve |
|---|---|---|---|
| Inkscape | Free | Beginners, full features | Moderate |
| Adobe Illustrator | $22.99/mo | Professionals | Steep |
| Affinity Designer | $74.99 one-time | Budget-conscious pros | Moderate |
| Canva | Free-$13/mo | Quick social graphics | Easy |
Basic design principles for Cricut SVGs:
- Use the pen tool to create custom shapes with anchor points
- Keep stroke widths consistent (0.5-1pt works best)
- Convert all text to outlines/paths before exporting
- Group related elements together
- Name your layers clearly for organization
For those interested in AI-assisted design, check out this comparison of AI vector generation vs manual creation.
Common SVG File Issues and How to Fix Them
Even experienced crafters encounter SVG problems. Here are the most common issues and their solutions:
Problem 1: Cricut Design Space Won't Upload File
- Solution: Save file as "Plain SVG" not "Inkscape SVG"
- Remove any embedded fonts or raster images
- Ensure file size is under 25MB
- For corrupted files, try this fix guide
Problem 2: Jagged or Irregular Cut Lines
- Solution: Simplify your path by reducing node count
- Increase the DPI of your original image before conversion
- Use the "Smooth" function in your vector editor
- Learn more about cleaning up AI-generated SVGs
Problem 3: Missing Elements After Upload
- Solution: Convert all strokes to fills
- Merge overlapping paths
- Ensure layers aren't hidden or locked
Problem 4: Wrong Size in Design Space
- Solution: Set your document size before creating the design
- Use the resize tool to scale while maintaining proportions
- Check that your software units match Design Space (inches)
Free SVG Resources and Where to Find Them
While creating custom SVGs gives you unique designs, free resources can supplement your library. You can also explore the SVGMaker gallery for inspiration and ready-to-use designs.
Reputable free SVG sources:
- Design Bundles (weekly freebies)
- Creative Fabrica (free designs with attribution)
- Pixabay (public domain vectors)
- FreeSVG.org (curated collection)
Important: Always verify commercial use licensing before selling items made with free SVGs. According to Creative Commons research, approximately 62% of "free" creative assets online have restrictions on commercial use, making verification essential for crafters selling their work.
Optimizing SVG Files for Different Cricut Materials
Different materials require different file preparations. Understanding these nuances can save you time and material waste.
Vinyl (HTV and Adhesive):
- Keep designs simple with clean lines
- Avoid intricate details smaller than 0.25 inches
- Use offset feature for layered looks
- Mirror designs for HTV applications
- Check out affordable SVGs for DIY projects for vinyl-ready designs
Cardstock and Paper:
- Can handle more detail than vinyl
- Add score lines for 3D projects
- Consider paper grain direction for large projects
Fabric and Felt:
- Simplify designs significantly
- Increase spacing between elements
- Avoid small text (minimum 0.5 inches)
SVG File Organization Tips
As your SVG library grows, organization becomes crucial. Research from McKinsey & Company found that employees spend an average of 1.8 hours per day searching for information, the same applies to crafters hunting through disorganized file libraries.
Best organization practices:
- Create folders by project type (birthdays, holidays, quotes, etc.)
- Use descriptive filenames (not "design1.svg")
- Tag files with searchable keywords
- Back up your SVG library to cloud storage
- Delete unused or low-quality files quarterly
- Consider using a digital asset management system for large collections
The Future of SVG Creation: AI and Automation
The SVG creation landscape is evolving rapidly. According to Gartner's 2025 report, AI-augmented design tools are among the top strategic technology trends, with 80% of designers expected to use AI-assisted tools by 2027.
In 2026, AI-powered tools can:
- Generate custom SVGs from text descriptions
- Automatically optimize designs for specific materials
- Suggest complementary design elements
- Predict cutting time and material usage
Tools like SVGMaker.io's AI generator are integrating these AI features, reducing design time from hours to minutes while maintaining professional quality. Learn more about the AI-powered SVG generation and how it's transforming the craft industry.
Quick Start Checklist
Ready to create your first SVG? Follow this checklist:
- Choose your creation method (generator, conversion, or from scratch)
- Ensure design complexity matches your skill level
- Check file requirements (closed paths, proper layering)
- Optimize for your specific material
- Test cut on scrap material first
- Save original files and backups
- Document successful settings for future reference
Final Thoughts
Creating SVG files for Cricut doesn't require expensive software or years of design experience. Whether you're using a free online generator like SVGMaker.io, converting existing images with the svg converter, or designing from scratch, the key is understanding what makes an SVG Cricut-compatible and starting with simple projects.
The most successful Cricut crafters combine multiple methods: using generators for quick projects, converting special images, and gradually building design skills for custom creations. Start with whichever method feels most accessible, and expand your skillset as you grow more comfortable.
For additional learning resources, explore the SVGMaker documentation and tutorial library to master advanced techniques.
Remember: every expert SVG designer started exactly where you are now. The difference isn't talent—it's simply taking that first step and creating your first file.