How to Convert Any Image to SVG with AI: Photos, PNG, JPG, WebP & More
You have a PNG logo that looked fine on your old website. Now you're redesigning, and it pixelates on retina displays, bleeds when you scale it for a banner, and looks fuzzy on your client's 4K monitor. You need it as an SVG — a clean, scalable vector — but the original design file was lost three agencies ago.
Or maybe you downloaded a perfect clipart PNG from a stock library, and now your Cricut machine needs an SVG to cut it. Or you're a web developer embedding icons that need to look sharp at every screen density without bloating your page load.
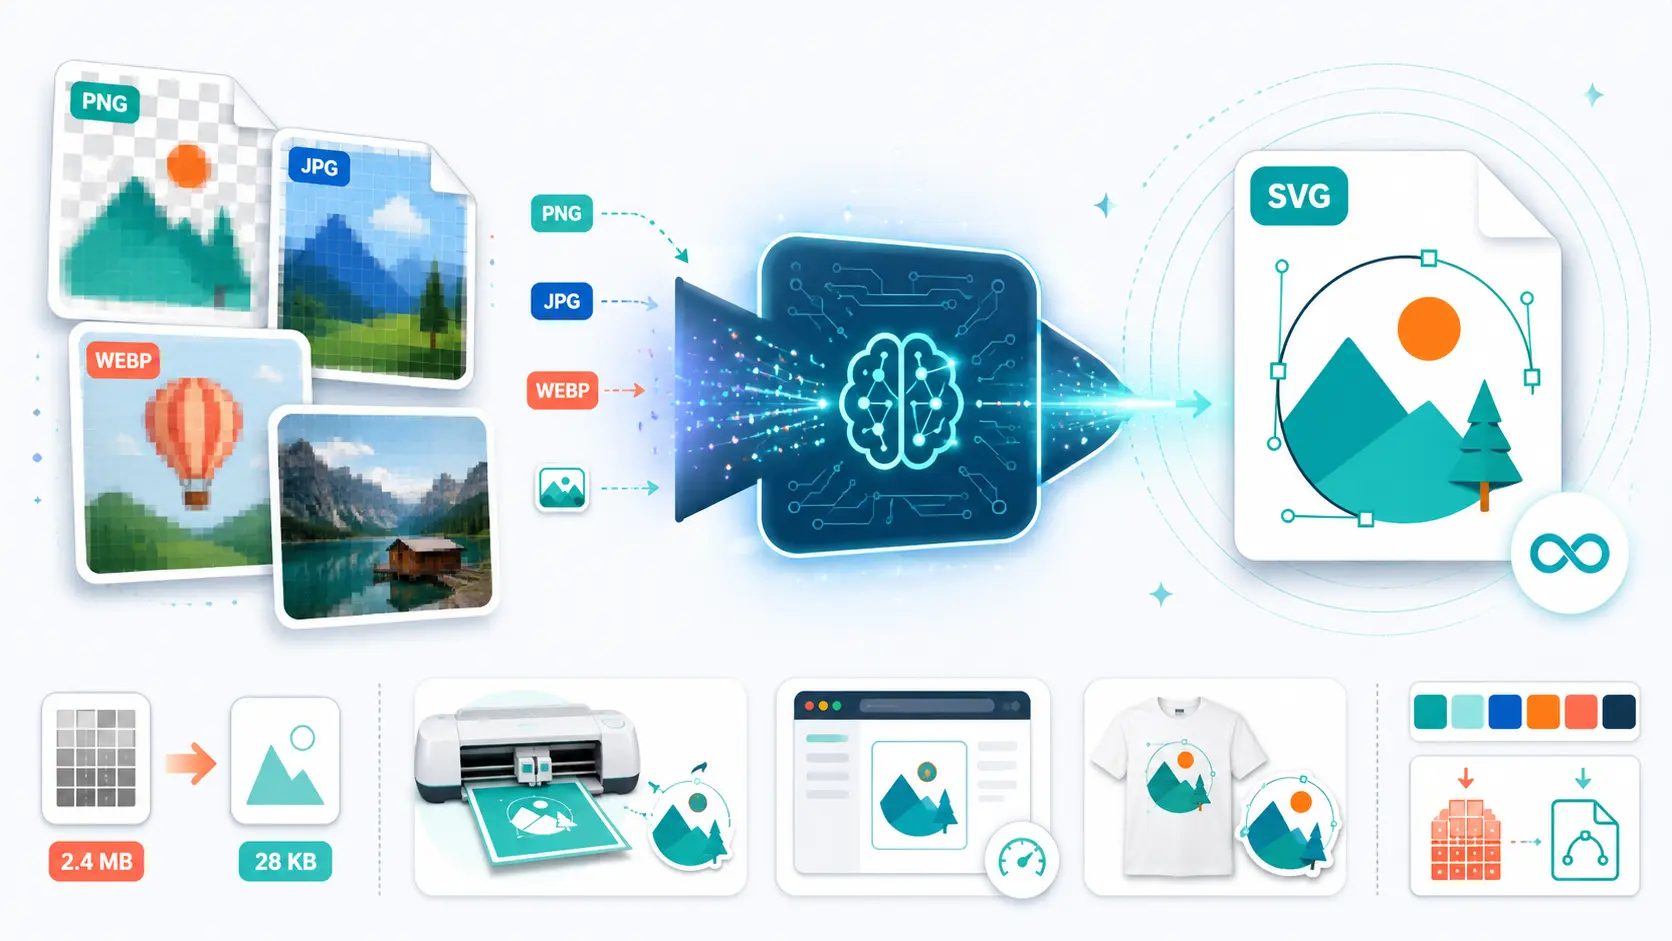
The common thread: you have a raster image (PNG, JPG, WebP, or a photo), and you need it converted to SVG. Not a fake vector that embeds the raster image inside an SVG wrapper. A real vector — with clean paths, accurate colors, and editable shapes.
This guide walks you through exactly how to convert any image to SVG, step by step. You'll learn which image types convert best, how AI-powered conversion compares to older methods, and how to use SVGMaker to go from a raster file to a production-ready SVG in under a minute.
What Happens When You Convert an Image to SVG
Before diving into the how-to, it helps to understand what “image to SVG” conversion actually means.
A raster image (PNG, JPG, WebP) stores visual information as a grid of colored pixels. Zoom in far enough, and you see the individual squares. An SVG (Scalable Vector Graphics) stores the same visual as mathematical instructions — curves, lines, shapes, and colors defined in code. Because SVGs describe shapes rather than pixels, they render perfectly at any size.
Converting an image to SVG means analyzing the pixel data and reconstructing it as vector paths. The conversion tool detects edges, identifies shapes, maps colors, and generates the mathematical curves that best represent the original image.
Here's how the two formats compare:
| Property | Raster Image (PNG/JPG) | SVG (Vector) |
|---|---|---|
| Made of | Pixels (colored dots) | Mathematical paths (code) |
| Scales without quality loss | No — blurs and pixelates | Yes — sharp at any size |
| Individually editable shapes | No — it's a flat bitmap | Yes — each path is selectable |
| File size at large dimensions | Grows exponentially | Stays small regardless of display size |
| Transparent backgrounds | PNG yes, JPG no | Yes (native support) |
| Screen reader accessible | No | Yes (supports embedded text and descriptions) |
| Best for | Photographs, screenshots | Icons, logos, illustrations, UI elements, print |
Understanding this distinction matters because it sets realistic expectations. A logo PNG will convert to an almost identical SVG. A photograph will become a stylized vector interpretation — beautiful, but not a pixel-for-pixel clone. The format fundamentally changes how the image is represented.
For simple format-to-format conversions (e.g., PNG to WebP, SVG to PDF), SVGMaker handles those separately from vectorization through its convert page.
Which Image Types Can You Convert to SVG?
Not all images convert equally well. The source format, complexity, and content type all affect the output quality. Here's what to expect from each common image type:
| Image Type | Common Sources | Conversion Difficulty | Expected SVG Quality | Best SVGMaker Workflow |
|---|---|---|---|---|
| PNG (transparent) | Logos, icons, clipart | Easy | Excellent — transparency gives clean edges | Converter |
| PNG (solid background) | Screenshots, simple graphics | Easy | Good — solid colors trace cleanly | Converter |
| JPG/JPEG | Web downloads, brand assets | Easy–Medium | Good for graphics; compression artifacts may need cleanup | Converter |
| WebP | Modern web images | Easy–Medium | Same as PNG/JPG depending on source content | Converter |
| GIF | Clipart, simple animations | Easy (static frame) | Good for flat graphics | Converter |
| TIFF | Scans, print-ready files | Easy | Good — high source resolution helps | Converter |
| AVIF | Next-generation web images | Easy–Medium | Good | Converter |
| Photos (any format) | Camera shots, stock photos | Hard | Stylized vector art (not photorealistic) | AI Photo to SVG |
| Hand-drawn sketches | Scans, phone photos | Medium | Good with post-conversion editing | Converter + SVG Editor |
| Logos (any format) | Brand assets, downloads | Easy | Excellent — the ideal use case for conversion | Converter |
Key takeaway: Flat, clean graphics — logos, icons, clipart, illustrations — convert almost perfectly to SVG. Photographs and highly detailed images become stylized vector artwork rather than photorealistic reproductions. If you need a vector version of a photo, SVGMaker's AI Photo to SVG tool generates prompt-guided vector interpretations that work beautifully for web, print, and merchandise.
3 Methods to Convert an Image to SVG (Compared)
There are three fundamentally different ways to turn a raster image into an SVG. The right choice depends on your quality requirements, time budget, and technical skill.
| Method | How It Works | Speed | Output Quality | Skill Required | Best For |
|---|---|---|---|---|---|
| AI-powered conversion | AI analyzes the image semantically — identifies shapes, edges, and colors — then generates optimized vector paths | 3–10 seconds | High — clean paths, accurate colors, efficient node count | None — upload and click | Most users, all image types |
| Traditional auto-tracing | Algorithm traces brightness and color boundaries using threshold rules | 5–40 seconds | Medium — works for simple images, struggles with complexity | Low–Medium (requires parameter tuning) | Simple high-contrast line art |
| Manual redraw | Designer recreates the image from scratch using pen and shape tools | 30 min–several hours | Highest possible (if the designer is skilled) | High — requires vector design expertise | Brand-critical assets needing pixel-perfect control |
AI-Powered Image to SVG Conversion
AI-powered converters like SVGMaker don't just trace pixel edges mechanically. They analyze the image semantically — understanding what constitutes a curve versus a corner, where one shape ends and another begins, and how colors relate to each other. The result is an SVG with fewer anchor points, smoother curves, and proper layer separation compared to traditional tracing.
This semantic understanding is why AI converters handle complex images (multi-color illustrations, logos with gradients, detailed clipart) that make traditional tracers produce messy, node-heavy output.
Traditional Auto-Tracing
Traditional tracing tools work by detecting brightness or color thresholds and generating paths along those boundaries. For a black logo on a white background, this works reasonably well. For anything more complex — gradients, multiple colors, fine details — the output becomes increasingly noisy. You'll spend significant time manually cleaning up excess anchor points, fixing jagged edges, and correcting color zones.
Manual Redraw in a Vector Editor
For brand-critical assets where every curve must be exact, manual redrawing in a vector editor remains an option. But AI conversion has made this the last resort rather than the default. In most workflows, converting with AI and then making targeted edits is faster and produces comparable results.
How to Convert an Image to SVG with SVGMaker (Step-by-Step)
Here's the complete workflow for converting any image to a production-ready SVG using SVGMaker. The entire process takes under a minute for most images.
Step 1: Upload Your Image
Go to SVGMaker's image to SVG converter. Drag and drop your file, or click to browse.
Supported input formats: PNG, JPG/JPEG, WebP, GIF, TIFF, AVIF
Tips for better results:
- Use the highest resolution source available. A 1000×1000px logo will produce a cleaner SVG than a 100×100px thumbnail of the same logo.
- If your image has a busy or complex background you don't need, consider removing it first with SVGMaker's SVG Background Remover — this gives the AI cleaner edges to work with.
- PNG files with transparency produce the best results because the AI doesn't need to separate foreground from background.
Step 2: AI Converts Your Image to SVG
Once uploaded, SVGMaker's AI analyzes your image and generates optimized vector paths. This typically takes 3–5 seconds.
During conversion, the AI:
- Detects shape boundaries and edges in the image
- Identifies distinct color regions and maps them accurately
- Generates smooth, efficient vector paths with minimal anchor points
- Preserves fine details like thin lines, text outlines, and small elements
- Optimizes the SVG code for small file size and fast rendering
The output is a clean, production-ready SVG — not a bloated trace with thousands of unnecessary nodes.
Step 3: Review and Edit the SVG
Preview the converted SVG directly in your browser. For most conversions — especially logos, icons, and simple graphics — the output is ready to use immediately. For more complex images, SVGMaker offers three editing paths:
| What You Want to Do | Which Editor to Use | How It Works |
|---|---|---|
| Change colors | SVG Editor or AI Editor | Click color picker / type "Change blue to #FF5733" |
| Remove unwanted elements | SVG Editor | Use the magic eraser to click and remove shapes |
| Remove background | SVG Background Remover or AI Editor | One-click removal / type "Remove the white background" |
| Simplify or optimize paths | SVG Code Editor | Reduce decimal precision, remove redundant nodes |
| Add accessibility tags | SVG Code Editor | Add <title> and <desc> elements for screen readers |
| Adjust the viewBox or canvas | SVG Code Editor | Edit the viewBox attribute directly |
| Make AI-guided changes | AI Editor | Type natural language commands: "Make the icon thicker" |
The visual SVG Editor handles most refinement tasks without touching code. The SVG Code Editor, powered by Monaco (the same engine as VS Code), gives developers full control over the SVG markup. And the AI-powered editor lets you describe changes in plain language — ideal for non-designers who need specific adjustments.
Step 4: Download or Export
Once your SVG looks right, export it in the format your workflow requires. SVGMaker supports multiple vector and print-ready formats:
| Use Case | Recommended Export Format | Why |
|---|---|---|
| Web development | SVG | Native browser support, smallest file size, CSS-styleable |
| Cricut / Silhouette cutting | SVG or DXF | Clean paths for cutting machines; DXF for legacy compatibility |
| Print production | EPS or PDF | Industry-standard print formats with embedded vector data |
| Laser cutting / CNC | DXF | Direct import into LightBurn, LaserGRBL, and other cutting software |
| Adobe Illustrator workflow | AI or EPS | Editable layers preserved in native format |
| General sharing | Universal compatibility across devices and platforms |
Image to SVG by Use Case: What Works Best
Different users need different things from an image to SVG conversion. Here's which SVGMaker workflow fits each common scenario:
| Use Case | Typical Source Image | Key Requirement | Recommended Workflow |
|---|---|---|---|
| Web developers | PNG/JPG icons, logos | Small file size, clean code, fast rendering | Converter → Code Editor for optimization |
| Cricut / vinyl cutting | Clipart PNGs, hand-drawn scans | Minimal nodes, smooth curves, weed-friendly paths | Converter → SVG Editor for path cleanup |
| Print-on-demand (Etsy, Redbubble) | Product graphics, illustrations | Scalability, color accuracy, multi-format export | Converter → export as SVG + PDF |
| Graphic designers | Client logos, brand assets | Editable layers, color fidelity, professional output | Converter → SVG Editor → AI Editor |
| Laser cutting / CNC | Technical drawings, artwork | Precise paths, DXF export | Converter → export as DXF |
| App / UI design | Icon sets, UI elements | Consistent sizing, pixel-perfect alignment, accessibility | Converter → Code Editor for ARIA tags |
| Photo to vector art | Camera photos, stock images | Stylized vector interpretation, prompt control | AI Photo to SVG → AI Editor |
No matter the use case, the core workflow is the same: upload your image, let the AI create the SVG, then refine with the right editor for your needs.
Common Image to SVG Problems (and How to Fix Them)
Even with AI-powered conversion, some images present challenges. Here are the most common issues and how to resolve them:
| Problem | Why It Happens | How to Fix It |
|---|---|---|
| SVG looks blurry or pixelated when zoomed | Source image resolution was too low | Use a higher-resolution source image (300+ DPI or 1000px+ dimensions) |
| Too many nodes / oversized file | Fine details or noise in the source image created excess anchor points | Edit in the SVG Code Editor to reduce decimal precision and simplify paths |
| Colors don't match the original | Color quantization during conversion shifted some values | Adjust specific colors in the SVG Editor or use the AI Editor: “Change #334455 to #2A3B4C” |
| Background wasn't removed | Source image had a solid or near-solid background the AI kept | Run through the SVG Background Remover before or after conversion |
| SVG won't open in Cricut Design Space | File contains unsupported elements or complex nested groups | Simplify in the SVG Code Editor: flatten groups, remove metadata, keep paths simple |
| Photo converted to flat blobs instead of realistic image | Photographs can't become photorealistic SVGs — vectors represent shapes, not pixels | Use AI Photo to SVG for a prompt-guided stylized vector interpretation instead |
| Fine text appears garbled or merged | Small text in raster images doesn't trace well at low resolution | Use a higher-resolution source, or recreate the text manually in the SVG Editor |
Most issues trace back to source image quality. The single best thing you can do for a clean image to SVG conversion is start with the highest resolution file available.
Batch Image to SVG Conversion with the API
If you need to convert dozens or hundreds of images to SVG — migrating a design library, processing a product catalog for print-on-demand, or automating conversions in a build pipeline — SVGMaker's REST API handles it at scale.
| API Feature | Detail |
|---|---|
| Batch size | Up to 10 images per request |
| Queuing | Unlimited — process as many batches as needed |
| Supported input formats | PNG, JPG, WebP, GIF, TIFF, AVIF |
| Output formats | SVG, PDF, EPS, DXF, AI, PostScript |
| Background removal | Built-in (optional parameter) |
| Authentication | API key |
| Response format | SVG URL + cloud storage details |
The API uses the same AI conversion engine as the web interface — same quality, same optimization, just at programmatic scale. It's designed for teams running production workflows where manual one-by-one conversion isn't feasible.
Frequently Asked Questions
1. What is the best free image to SVG converter?
SVGMaker offers a generous free tier: 6 credits on signup plus 3 additional credits every day. Each conversion costs 1 credit, so you can convert several images daily at no cost. The AI-powered conversion produces significantly cleaner output than fully-free tools that use basic threshold tracing — fewer nodes, better color accuracy, and proper layer separation.
2. Can I convert a JPG photo to SVG?
Yes, but set the right expectations. A JPG photo won't become a photorealistic SVG — that's not how vector graphics work. Instead, the conversion produces a stylized vector interpretation of the photo. For standard graphics, logos, and illustrations saved as JPG, the conversion works excellently. For actual photographs, use SVGMaker's AI Photo to SVG tool, which lets you guide the style with a text prompt.
3. How do I convert a PNG image to SVG without losing quality?
Start with the highest resolution PNG available — the more pixel data the AI has to work with, the more accurately it can reconstruct vector paths. Upload to an AI-powered converter like SVGMaker, which preserves edges, colors, and fine details far better than traditional tracing tools. PNGs with transparency produce the cleanest results because the AI doesn't need to separate foreground from background.
4. Is AI image to SVG conversion better than Inkscape's Trace Bitmap?
For the vast majority of images, yes. AI-powered conversion analyzes images semantically — understanding shapes, curves, and color relationships — while Inkscape's Potrace engine traces brightness thresholds mechanically. AI produces cleaner paths, fewer unnecessary nodes, better color fidelity, and proper layer separation. Inkscape's Trace Bitmap still works adequately for simple, high-contrast black-and-white line art, but struggles with gradients, multiple colors, and fine details.
5. Can I convert an image to SVG for Cricut?
Yes. The key to Cricut-friendly SVGs is minimal node count and smooth curves — excess anchor points cause weeding nightmares and cutting errors. SVGMaker's AI conversion optimizes for efficient paths automatically. After converting, you can further simplify the output in the SVG Editor if needed. Export as SVG for direct import into Cricut Design Space, or as DXF for legacy compatibility.
6. What image formats can be converted to SVG?
SVGMaker accepts PNG, JPG/JPEG, WebP, GIF, TIFF, and AVIF as input formats for image to SVG conversion. All six formats go through the same AI-powered vectorization process. For format-to-format conversions that don't involve vectorization (like PNG to WebP or SVG to PDF), use SVGMaker's convert page.
7. Can I batch convert hundreds of images to SVG?
Yes. SVGMaker's REST API supports up to 10 images per batch request with unlimited queuing. You can automate large-scale conversions — design library migrations, product catalog processing, build pipeline integrations — using the same AI engine that powers the web converter.
8. How do I edit an SVG after converting from an image?
SVGMaker provides three editing paths. The SVG Editor offers visual editing — change colors, remove elements, adjust layers. The SVG Code Editor gives developers direct control over the SVG markup with real-time preview. And the AI Editor accepts natural language commands like “change the red elements to blue” or “remove the background shape.”
9. Why does my image to SVG conversion look different from the original?
Vectorization reconstructs your image as mathematical shapes — it doesn't copy pixels. Flat, clean graphics (logos, icons, clipart) convert with near-perfect fidelity. Images with gradients, fine textures, or photographic detail will show more interpretation, because the AI must decide how to represent continuous tonal variation as discrete vector paths. For the closest match, start with a high-resolution source and use the SVG Editor to fine-tune any areas that need adjustment.
10. Is it legal to convert someone else's image to SVG?
Converting an image to a different format doesn't change its copyright status. If you have the right to use the original image (you created it, you bought a license, or it's in the public domain), you can convert it to SVG. If you don't have usage rights to the original, creating an SVG version doesn't grant them. SVG is a file format, not a license.
Conclusion
Converting an image to SVG used to mean either paying a designer to redraw it by hand or fighting with threshold-based tracers that produced messy, node-heavy output requiring hours of cleanup. AI has changed that equation entirely.
With SVGMaker's image to SVG converter, you upload a PNG, JPG, WebP, or any supported raster format and get a clean, optimized, production-ready SVG in seconds. The AI handles edge detection, color mapping, path optimization, and layer separation automatically. You edit the result with a visual editor, a code editor, or natural language commands — whatever fits your skill level and workflow.
Whether you're a web developer embedding lightweight SVG icons, a Cricut user cutting vinyl decals, a print-on-demand seller scaling artwork for merchandise, or a designer converting client logos to scalable vectors — the workflow is the same: upload, convert, refine, export.
Try SVGMaker's converter on your next image — you get free credits to start — and see how AI-powered image to SVG conversion compares to whatever you've been using.