SVG Background Remover vs PNG Background Remover: What’s the Difference?
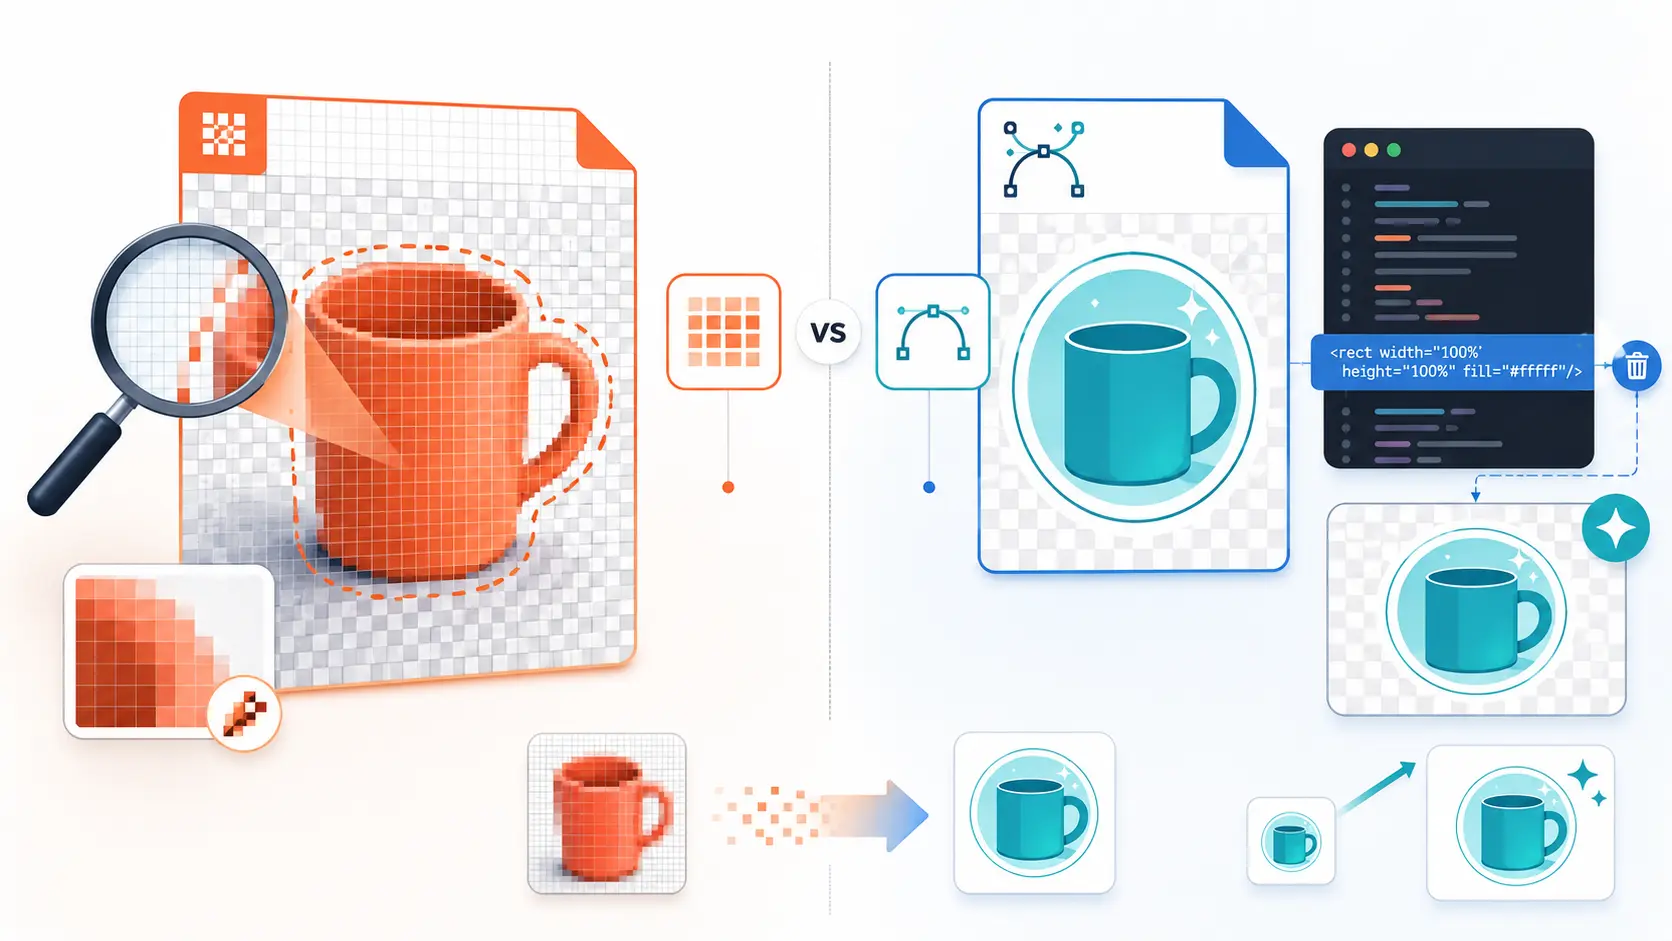
You have a logo with an unsightly box behind it, and you want to remove the background. So you look for a background remover, upload your file, and hope it works. Sometimes, you get a clear, transparent result. Other times, the edges appear fuzzy, the file size increases, or the artwork becomes blurry when you scale it.
What went wrong?
Many people overlook this: there is no single type of background remover. PNG and SVG background removers deal with different file formats and remove backgrounds in distinct ways. If you choose the wrong one, you might lose image quality, scalability, or waste valuable time using a tool not meant for your file.
SVGMaker offers tools to remove backgrounds from scalable vector graphics. This guide explains how PNG and SVG background removal differ, the common mistake that can ruin your artwork, and how to pick the right SVGMaker background remover for your file.
The Quick Answer
Before we go deep, here is the whole comparison in one table. If you only read this far, you already know enough to choose correctly.
| PNG Background Remover | SVG Background Remover | |
|---|---|---|
| Works on | Raster images (PNG, JPG, photos) | Vector files (SVG code) |
| How it decides what to remove | AI analyzes pixels: color, contrast, and edges | Reads the code and finds the background element |
| What you get out | A PNG with a transparent (alpha) layer | A clean, still fully vector SVG |
| Scalability | Fixed resolution, blurs when enlarged | Infinitely scalable, stays sharp at any size |
| Best for | Photos, product shots, complex imagery | Logos, icons, illustrations, cut files |
The key takeaway: a PNG remover thinks in pixels, and an SVG remover thinks in shapes. That single distinction drives everything below.
What a PNG Background Remover Does
A PNG is a raster image. Raster means the picture is stored as a grid of tiny colored squares called pixels. There is no “logo shape” or “background shape” inside the file, just millions of pixels sitting next to each other. To the file, the subject and the background are the same kind of data.
Because of that, a PNG background remover cannot simply delete a background element, since one does not exist. Instead it uses AI to guess. The tool scans the pixels, studies color, contrast, and the edges where one region meets another, and predicts which pixels belong to the subject and which belong to the background. It then makes the background pixels transparent by writing an alpha channel, the invisible layer that tells a program “show nothing here.”
This works impressively well for the job it was built for: photos and rich, detailed imagery. A portrait, a product on a table, a pet on a couch. These are things that only exist as pixels in the first place, so a raster tool is exactly right.
The tradeoffs show up at the edges and at scale. Because the tool is guessing pixel by pixel, hard shapes and fine details (hair, thin lines, sharp corners) can come back slightly fuzzy or ragged. And because the output is still a fixed grid of pixels, blowing it up past its original size makes it soft and blocky. A PNG cutout is only as sharp as the resolution you started with.
What an SVG Background Remover Does
An SVG is a completely different animal. SVG stands for Scalable Vector Graphics, and instead of storing pixels, it stores instructions: “draw this path, fill it blue, place this circle here.” The file is essentially readable code. That means the background is usually a real, named object inside the file, a full canvas rectangle, a frame fill, or a set of shapes sitting behind the artwork.
Because the background is an actual element, an SVG background remover does not have to guess anything. It reads the code, identifies the element acting as the background, and removes it. The rest of your artwork is untouched, and the file stays a true vector. The output is a clean SVG with a genuinely transparent background that still scales to any size with zero loss of quality.
This is exactly what the SVGMaker’s Background Remover is built for. You upload your SVG, it removes the background in a single step, and you download a sharp, scalable SVG. Crucially, it removes the background from the vector itself rather than flattening your file into a picture first, which is what keeps the result crisp at every size.
The Real Difference: It Comes Down to Your File Format
Here is the mental model that makes this simple. The right tool is not about which one is “better.” It is about two questions: what format is your file right now, and what format do you need at the end?
| Your file coming in | What you need coming out | Use this |
|---|---|---|
| PNG or JPG (a photo) | A PNG cutout is fine | PNG background remover |
| SVG (logo, icon, illustration) | A scalable SVG | SVG background remover |
| PNG or JPG, but you need it to scale | A crisp SVG | Convert to SVG first, then remove the background |
That last row is the one people trip over. If you own a raster logo but need a version that stays razor sharp on a billboard or a tiny favicon, do not just run it through a PNG remover. Instead, convert it to SVG first so your artwork becomes real vector shapes, then clean the background as a vector. You end up with a file that is both transparent and infinitely scalable, which no raster tool can give you.
The Mistake to Avoid: Running an SVG Through a Raster Remover
This is the trap that quietly ruins good artwork. Many generic “background removers” online only understand pixels. When you feed them an SVG, they cannot read the vector code, so behind the scenes they rasterize it, meaning they flatten your beautiful, scalable vector into a fixed grid of pixels before doing anything. Then they hand you back a PNG.
You started with an infinitely scalable file and ended with a blurry, resolution locked image. The transparency might look right at first glance, but you have thrown away the single biggest advantage of working in SVG.
How do you know it happened? Check what you got back. If you uploaded an SVG and downloaded a PNG or JPG, the tool rasterized it. If you enlarge the result and the edges turn soft, it is no longer a vector. The fix is to use a tool that operates on the vector code directly, so an SVG goes in and an SVG comes out, still made of shapes rather than pixels.
Which One Do You Need?
Match your situation to the row below and you cannot go wrong.
| Your situation | Best tool | Why |
|---|---|---|
| Cutting a person or product out of a photo | PNG background remover | The source only exists as pixels, so raster AI is the right fit |
| Cleaning a white box off a logo or icon | SVG background remover | Removes the background as an element and keeps it scalable |
| Preparing a whole icon set | SVG background remover | Vector output stays sharp across every size and screen |
| Making Cricut or cut files transparent | SVG background remover | Cutting machines need clean vector paths, not raster edges |
| You have a PNG but need it to scale | Convert to SVG, then remove | Vectorize first so the final file never blurs |
| A mixed batch of photos and vectors | Both, sorted by format | Send rasters to a PNG tool and vectors to an SVG tool |
Converting Between Formats When You Need To
Sometimes the real answer is not a background remover at all, but a format change first. If your artwork lives as a PNG or JPG and you need it to scale, vectorize it before you touch the background, so you finish with a true SVG instead of a pixel cutout.
And if you simply need to move between formats, turning a PNG into an SVG, or an SVG back into a PNG for an email or a slide deck, an Image Converter handles the interchange for you. Getting the format right first makes the background step clean and predictable, instead of a guessing game.
Frequently Asked Questions
1. Can I use a PNG background remover on an SVG file?
You can upload one, but most raster tools will flatten your SVG into pixels before processing it, so you get a blurry PNG back and lose scalability. If you want the result to stay a sharp, scalable SVG, use a vector aware SVG background remover that reads the code directly instead of rasterizing it.
2. Does removing an SVG background reduce the quality of my file?
No. Removing a background element from an SVG does not touch the resolution or sharpness of the rest of your artwork, because vectors are made of math, not pixels. It stays crisp at any size. This only holds if you use a vector aware tool, since a generic remover that converts your SVG to a PNG first will cost you that scalability.
3. Why does my SVG still show a white box after I try to remove it?
The white is almost always a real element inside the file, often a full canvas rectangle or a frame fill sitting behind your artwork. A vector background remover finds and deletes that element. If you enlarge the file over a colored background and the white blocks the color everywhere, you have a genuine background element to remove rather than a viewer quirk.
4. What is the actual difference between raster and vector background removal?
Raster removal works on pixels: AI guesses which pixels are background and makes them transparent, and the output stays a fixed resolution image. Vector removal works on shapes: it reads the code, finds the background object, and removes it, keeping the file infinitely scalable. One guesses, the other reads.
5. Should I convert my PNG to SVG before removing the background?
Only if you need the final result to scale, for example a logo used at many sizes. In that case, convert into an SVG first, then remove the background as a vector, so you end up with a transparent file that stays sharp everywhere. If a fixed size PNG cutout is all you need, a PNG remover is quicker.
6. Which tool is better for logos and icons?
An SVG background remover, almost every time. Logos and icons need to look perfect at any size, from a tiny favicon to a large banner, and only a vector file delivers that. Removing the background as a vector keeps the artwork scalable, which a PNG cutout can never do.
7. Will a background remover work on a batch of mixed files?
Sort by format first. Send your photos and raster images to a PNG remover, and your logos, icons, and illustrations to an SVG remover. Trying to run everything through one raster tool will quietly flatten your vectors and undo their biggest advantage.
Conclusion
A PNG background remover and an SVG background remover are not two versions of the same thing. One works on pixels and gives you a fixed resolution cutout, the other works on vector code and gives you a file that stays razor sharp at any size. The right choice always comes back to your file: match the remover to the format you have, and to the format you need.
When your artwork needs to scale, a photo turned logo, an icon set, a cut file, reach for the vector native path. Vectorize first if you are starting from a PNG, then clean the background as a vector so the result stays transparent and perfectly sharp everywhere it lands.