What File Formats Does Redbubble Accept? SVG, PNG, and What to Know
Quick Summary
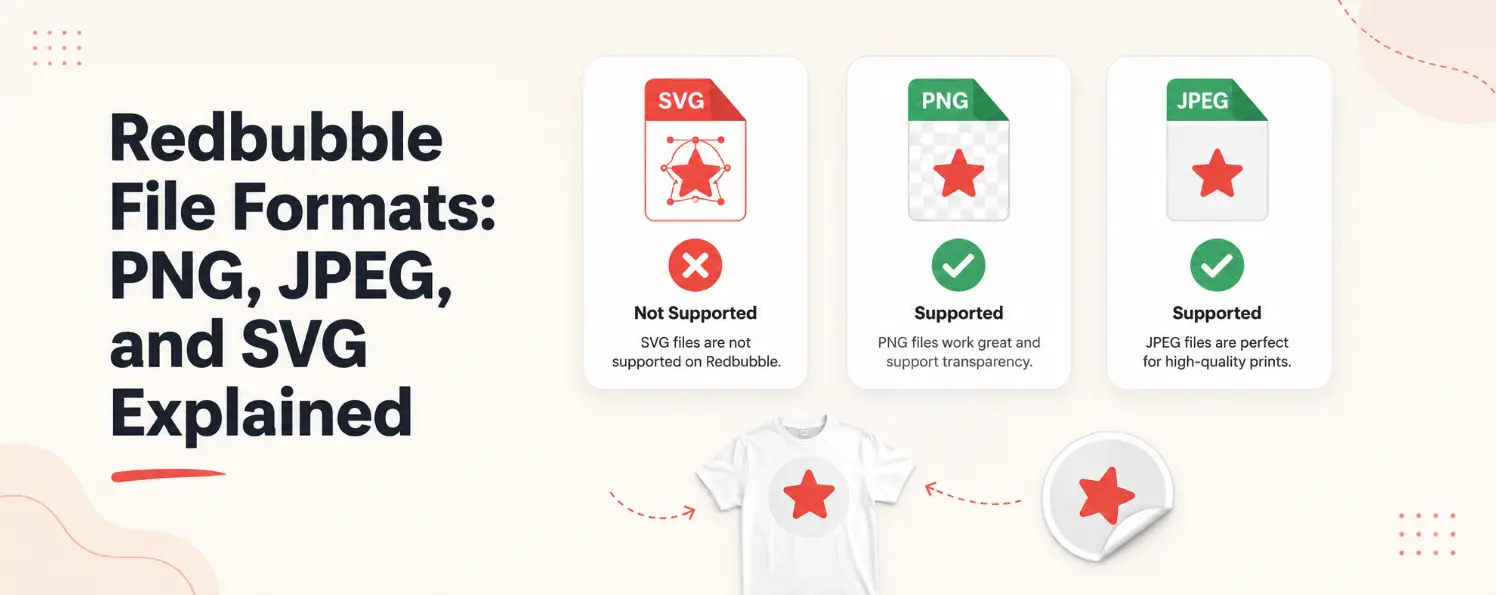
- Redbubble currently accepts PNG and JPEG files through its standard uploader, SVG is not supported for direct upload.
- PNG is the better choice for most designs because it supports transparent backgrounds, which matters for stickers, logos, and apparel graphics.
- JPEG works for photos and detailed imagery but creates white backgrounds around graphics with no transparency support.
- Redbubble recommends RGB color mode, 300 DPI, and a maximum upload dimension of 13,500 x 13,500 px.
- Many professional creators still design in SVG first because it allows clean scaling and easy editing then export as high-resolution PNG before uploading.
- SVGMaker supports this workflow: design and refine your artwork in SVG, then export a properly sized PNG ready for Redbubble.
Redbubble File Formats: What You Can Actually Upload
The current file formats accepted by Redbubble are PNG and JPEG. Here are the most important upload specifications.
| Requirement | Redbubble Recommendation |
|---|---|
| Accepted formats | PNG, JPEG |
| Maximum file size | 300 MB |
| Maximum dimensions | 13,500 x 13,500 px |
| Color mode | RGB |
| Recommended DPI | 300 DPI |
These settings help Redbubble print your artwork clearly on products like stickers, shirts, posters, and phone cases. If your file does not match these recommendations, your design may not print correctly.
Why This Confuses So Many Sellers
A lot of creators work with SVG files because SVG is excellent for design editing and scaling. That is why many people search: does Redbubble accept SVG?
The confusion usually comes from Cricut workflows, laser cutting tutorials, and outdated print-on-demand articles online. But Redbubble works differently. Instead of direct SVG uploads, Redbubble uses raster image uploads like PNG and JPEG.
Does Redbubble Accept SVG Files?
No. At the moment, Redbubble does not support direct SVG uploads through its standard uploader.
This is important because many creators build artwork in SVG format first. But that does not mean SVG is useless for Redbubble. In fact, many professional creators still design in SVG because it gives them:
- Scalable artwork that stays sharp at any dimension
- Cleaner editing with no pixelation
- Sharper design quality overall
- Flexible resizing before final export
The important step is what happens after the design is finished. Instead of uploading SVG directly, creators export the artwork as a high-resolution PNG before uploading it to Redbubble.
This is where a workflow using SVGMaker becomes very useful. You can generate and refine SVG artwork using the AI generator or SVG editor, then export a clean PNG at the correct dimensions for Redbubble.
Why Designers Still Use SVG Before Exporting PNG
SVG files are excellent for creating and editing artwork because you can resize designs without losing quality, edit text and shapes easily, and create cleaner graphics that scale to any product size.
A common workflow looks like this:
| Step | Workflow |
|---|---|
| 1 | Create artwork in SVGMaker |
| 2 | Edit and refine the SVG |
| 3 | Export at high resolution |
| 4 | Save as PNG |
| 5 | Upload PNG to Redbubble |
This keeps your original artwork flexible while still following Redbubble's upload requirements. The SVG remains your master file for future edits, while the PNG is what actually goes to the platform.
PNG vs JPEG for Redbubble: Which One Should You Use?
Many new sellers compare PNG vs JPEG because both formats are accepted. But they work differently.
| Format | Best For | Limitation |
|---|---|---|
| PNG | Stickers, transparent artwork, graphics | Larger file size |
| JPEG | Photos and detailed images | No transparency support |
For most Redbubble products, PNG is the better choice.
Why PNG Is Usually Better for Redbubble
PNG files support transparent backgrounds. This is extremely important for stickers, text designs, logos, and graphics placed on shirts or phone cases.
For example, if you upload a sticker design as JPEG, you may end up with a white box around the artwork instead of a clean cutout edge. That is why many creators prefer PNG workflows for Redbubble uploads.
PNG also keeps edges cleaner for graphic designs and illustrations, which matters when your design is printed on a wide range of products with different background colors.
Redbubble Size and Resolution Requirements Explained Simply
Even if you use the correct file format, poor dimensions can still ruin your upload. This is why many new sellers end up with blurry products.
Here are some recommended sizes for common products:
| Product | Recommended Size |
|---|---|
| T-shirts | 2,875 x 3,900 px |
| Stickers | 2,800 x 2,800 px |
| Art prints | 3,840 x 3,840 px |
Higher resolution gives better print quality. If your upload dimensions are too low, your design may look blurry, appear stretched, or lose sharpness when printed.
This is why exporting correctly from your design tool matters. When you create artwork in SVG first, you can scale it cleanly to any dimension before exporting a PNG, preserving full image quality across different Redbubble products.
RGB vs CMYK: Which Color Mode Should You Use?
Redbubble recommends RGB uploads. Many designers create artwork in CMYK for offset printing, but Redbubble's upload system works with RGB files. If you upload the wrong color mode, colors may appear different after printing.
To reduce color issues:
- Export in RGB color mode
- Use high-quality PNG files
- Avoid low-resolution artwork
This helps your products look closer to your original design when printed.
How to Prepare SVG Designs for Redbubble the Right Way
If you already create SVG artwork, you do not need to change your whole workflow. You simply need to prepare the final export correctly.
Here is a beginner-friendly process using SVGMaker:
Step 1: Create Your Artwork in SVGMaker
Design and edit your SVG artwork inside the SVGMaker generator or editor.
Step 2: Keep Your SVG as the Master File
This lets you resize and edit your design later without losing quality.
Step 3: Export a High-Resolution PNG
Choose dimensions that match Redbubble product recommendations. For most products, 300 DPI at the correct pixel dimensions is the safe standard.
Step 4: Check Transparency
For stickers and graphics, confirm the PNG background stays transparent before uploading.
Step 5: Upload to Redbubble
Your PNG is now ready for the Redbubble uploader.
This workflow is simple, clean, and beginner-friendly. For creators converting existing images into SVG before redesigning for Redbubble, SVG converter and photo-to-SVG tool are useful starting points.
Common Redbubble Upload Problems and How to Fix Them
| Problem | Likely Cause | Fix |
|---|---|---|
| Blurry prints | Low resolution | Export a larger PNG |
| White background | JPEG instead of PNG | Use transparent PNG |
| Upload fails | File too large | Reduce file size |
| Dull colors | Wrong color mode | Export in RGB |
These small fixes make a significant difference in final print quality. Most beginner mistakes come down to one of these four issues.
Quick Redbubble Upload Checklist
Before uploading your artwork, check these points:
| Checklist Item | Why It Matters |
|---|---|
| PNG or JPEG format | Required by Redbubble uploader |
| RGB color mode | Matches Redbubble’s print workflow |
| High resolution (300 DPI) | Better print quality across all products |
| Transparent PNG background | Critical for stickers and overlaid graphics |
| Correct dimensions per product | Prevents blurry or stretched output |
Frequently Asked Questions
1. What file formats does Redbubble accept for uploads?
Redbubble currently accepts PNG and JPEG files through its standard uploader. SVG files are not directly supported for upload.
2. Does Redbubble accept SVG files?
No. Redbubble does not currently support direct SVG uploads. Many creators design in SVG first, then export as high-resolution PNG before uploading.
3. Why do people think Redbubble accepts SVG?
The confusion comes from Cricut workflows, laser cutting tutorials, and outdated print-on-demand articles online that have not been updated to reflect current Redbubble requirements.
4. Which is better for Redbubble: PNG or JPEG?
PNG is better for most designs because it supports transparent backgrounds. JPEG works for photography but leaves white backgrounds around graphics, which is a problem for stickers and overlaid designs.
5. Why does my design look blurry after uploading?
Low resolution is the most common cause. Export your PNG at 300 DPI and at the correct pixel dimensions for the product type you are targeting.
6. Why do colors look different after printing?
This usually happens when artwork is exported in CMYK instead of RGB. Redbubble's system is built for RGB uploads. Switching to RGB before export reduces this difference.
7. What is the best resolution for Redbubble uploads?
Redbubble recommends 300 DPI with a maximum dimension of 13,500 x 13,500 px. For specific products, use the recommended sizes listed in their product guidelines.
Conclusion
Understanding what file formats Redbubble accepts is important if you want clean and professional uploads from the start. Right now, Redbubble accepts PNG and JPEG files, not direct SVG uploads. But SVG still plays a valuable role in the design process because it helps creators build scalable and flexible artwork that can be exported at any size without losing quality.
The easiest workflow is: create and edit in SVG, export as high-resolution PNG, upload the PNG to Redbubble.
If you want a simple way to create SVG artwork and prepare clean PNG exports for Redbubble, SVGMaker gives you an easy workflow that beginners can follow without feeling overwhelmed.