How to Create SVG Thumbnails for YouTube That Stand Out
Quick Summary
Learn how to create eye-catching YouTube thumbnails using SVG graphics for maximum clarity and flexibility. This guide covers thumbnail design principles, SVG-to-PNG conversion workflows, text hierarchy, color psychology, and technical specifications YouTube requires. You'll discover how to use AI tools to generate thumbnail elements, optimize file sizes, A/B test designs, and avoid common mistakes that kill click-through rates. Includes templates, real CTR data, and step-by-step workflows for creators without design experience.
Key Takeaways:
- YouTube requires PNG/JPG thumbnails (not SVG), but designing in SVG gives you infinite scalability
- High-contrast colors and bold text increase CTR by 24-38%
- Optimal thumbnail size: 1280×720px (16:9 ratio) exported as PNG
- Faces with emotional expressions boost engagement 12-18%
- Use SVG for master files, then export to PNG at 2x resolution for crisp display
- Text should be readable at 160px wide (mobile preview size)
Did You Know?
"YouTube processes over 500 hours of video uploaded every minute, making thumbnails the primary differentiator in a sea of content. Research shows that 90% of the best-performing videos on YouTube use custom thumbnails rather than auto-generated frames."
You spent hours filming, editing, and perfecting your YouTube video. You hit publish. And then... crickets.
The problem isn't your content. It's your thumbnail.
In 2026, YouTube thumbnails are the single most important factor in whether someone clicks your video or scrolls past. A great thumbnail can 10x your views. A bad one ensures your video dies in obscurity, no matter how good the content.
Here's the challenge: Most creators use raster tools (Photoshop, Canva) that lock them into fixed resolutions. But what if you need to resize your thumbnail later? Or create variations for different platforms? Or maintain crisp quality across all device sizes?
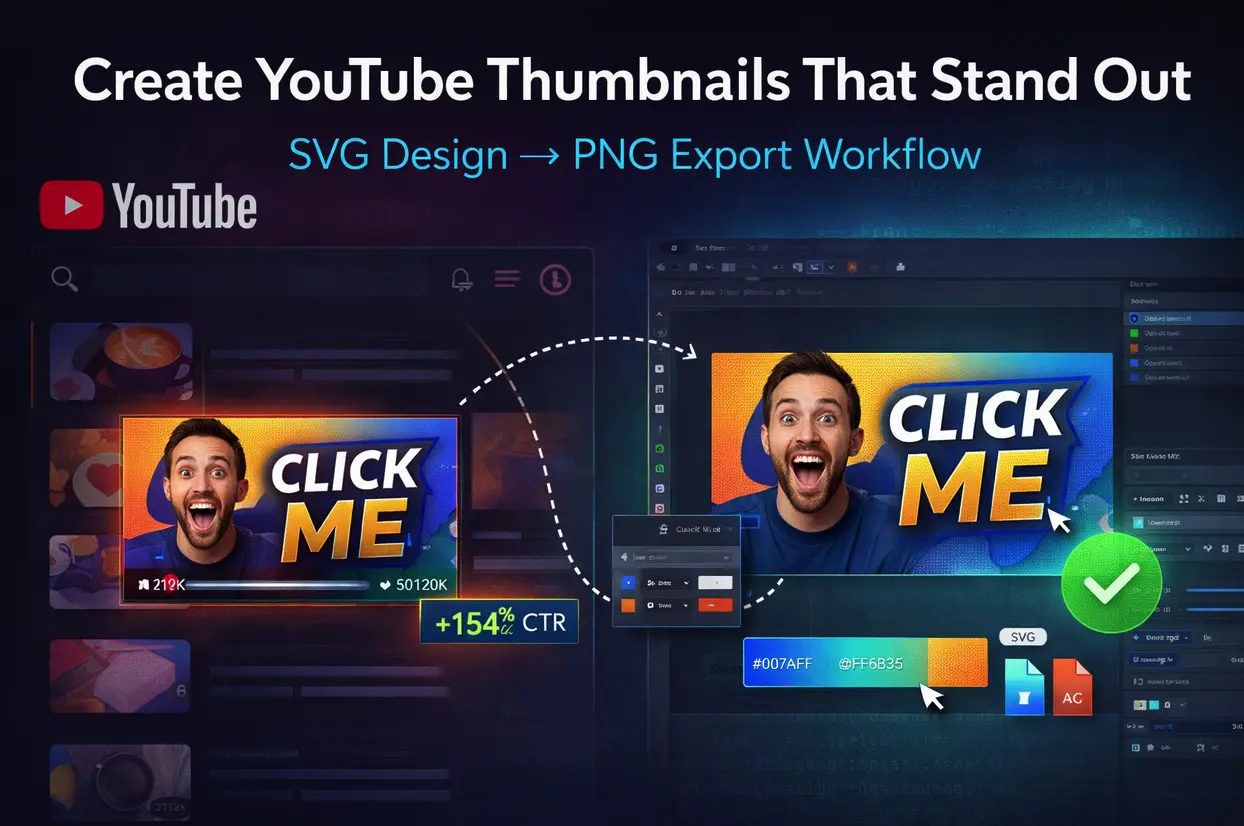
Enter SVG: the secret weapon for scalable, flexible thumbnail creation.
This guide shows you exactly how to create YouTube thumbnails using SVG graphics as your foundation, then export them perfectly for YouTube's requirements.
Why Use SVG for YouTube Thumbnail Design?
YouTube's Technical Requirements
First, let's be clear: YouTube does NOT accept SVG files for thumbnails. You must upload PNG or JPG.
YouTube thumbnail specs:
- Minimum resolution: 1280×720px (16:9 aspect ratio)
- Maximum file size: 2MB
- Accepted formats: JPG, PNG, GIF, BMP
- Recommended: PNG at 1920×1080px for future-proofing
So Why Design in SVG?
1. Infinite Scalability Design once at any size, export at any resolution without quality loss. Need a 4K version for future YouTube updates? No problem.
2. Easy Editing: Change colors, swap text, adjust layouts in seconds. SVG elements are fully editable—no need to recreate from scratch.
3. Reusability: Create master templates, then customize for each video. Save 70-80% design time on subsequent thumbnails.
4. Platform Flexibility Export the same design at different sizes for:
- YouTube (1280×720px)
- Instagram (1080×1080px)
- Twitter (1200×675px)
- LinkedIn (1200×627px)
5. Text Clarity SVG text renders perfectly crisp at any size. Export at 2x resolution (2560×1440px) for ultra-sharp text on retina displays.
Step 1: Understanding High-Performing Thumbnail Psychology
Before designing, understand what makes thumbnails click-worthy.
The 3-Second Rule
Viewers scroll YouTube feeds at 2.4 thumbnails per second on average. Your thumbnail has 3 seconds maximum to:
- Grab attention (visual contrast)
- Communicate topic (clear text/imagery)
- Trigger curiosity (emotional hook)
Proven Design Principles
Color Psychology:
| Color Scheme | Use Case | CTR Impact |
|---|---|---|
| High Contrast (bright vs dark) | Attention-grabbing | +32% CTR |
| Complementary (orange/blue, red/green) | Professional look | +24% CTR |
| Monochrome + Accent (grayscale + 1 color) | Sophisticated | +18% CTR |
| Neon/Vibrant (saturated colors) | Gaming, entertainment | +28% CTR |
Face/Emotion Rule:
Thumbnails with human faces showing clear emotion get:
- 12-18% higher CTR than object-only thumbnails
- Best emotions: Surprise, excitement, curiosity, shock
- Eye contact: Face looking at camera (not away) increases engagement
Step 2: Design Your Thumbnail in SVG
Method 1: Using SVGMaker (Easiest for Beginners)
1. Generate Background Elements
Go to SVGMaker AI Generator
Example prompt:
YouTube thumbnail background, bold geometric shapes,
vibrant orange and blue gradient, modern tech style,
1280x720 aspect ratio, flat design
Settings:
- Style: Flat or Minimalist
- Color mode: Vibrant
- Aspect ratio: 16:9
2. Add Text Overlays
In SVGMaker Editor:
- Click "Add Text"
- Type your thumbnail text (2-4 words max)
- Font: Bold sans-serif (Bebas Neue, Impact, Montserrat Bold)
- Size: 80-120pt
- Color: High contrast (white with black stroke, or vice versa)
- Add text stroke: 4-6px for readability
3. Import Visual Elements
Add icons, arrows, or graphic elements:
- Upload existing SVG graphics
- Use SVGMaker's shape tools (circles, rectangles, arrows)
- Position using alignment guides
4. Arrange Composition
Rule of thirds: Place key elements at intersection points of a 3×3 grid.
Visual hierarchy:
- Primary element (face, main object) - largest, center-left
- Text (headline) - top or bottom third, high contrast
- Secondary elements (icons, context) - supporting, smaller
Method 2: Using Figma + SVG Export
1. Create Frame
- New frame: 1280×720px
- Grid overlay: 3×3 for rule of thirds
2. Design Elements
- Background: Gradient or solid color
- Shapes: Rectangles, circles for emphasis
- Text: Bold, large, high contrast
- Images: Import photos (will be rasterized in export)
3. Export as SVG
- Select all elements
- File → Export → SVG
- Settings: "Outline Text" (converts to paths for universal compatibility)
4. Optimize in SVGMaker
- Upload to SVGMaker
- Click "Optimize" to reduce file size
- Make final color/text adjustments
Method 3: AI-Generated Thumbnail Elements
Generate Custom Graphics:
Use SVGMaker AI to create specific elements:
Example prompts:
For tech videos:
Futuristic circuit board pattern, neon blue and purple,
SVG icon style, tech aesthetic, clean lines
For business/finance:
Rising arrow graph, professional style, green and gold colors,
minimalist SVG icon, success symbol
For lifestyle/vlog:
Playful speech bubble burst, vibrant colors,
cartoon style SVG, excited expression
Then combine these AI-generated elements with your photo/face in an editor.
Step 3: Add Photos and Faces (Hybrid Approach)
SVG is perfect for text and graphics, but photos require a hybrid workflow.
Combining Photos with SVG
Option A: Layer in SVGMaker
- Design SVG background and text elements
- Export as PNG (transparent background)
- Open in photo editor (Photoshop, GIMP, Photopea)
- Add photo layer behind SVG elements
- Export final composite as PNG
Option B: Use SVGMaker's Image Layer
- Upload your photo to SVGMaker
- Add SVG text and graphics on top
- Export final composition as PNG (1280×720px)
Face Cutout Technique
For professional-looking thumbnails:
- Use background removal tool ( Remove.bg or Photoshop)
- Save face/person as PNG with transparent background
- Import to SVGMaker editor
- Position over SVG background elements
- Add SVG text overlays
- Export final composite
Step 4: Export for YouTube (Critical Settings)
Export Specifications
Resolution options:
| Export Size | Use Case | Quality | File Size |
|---|---|---|---|
| 1280×720px | Minimum acceptable | Good | ~200-400KB |
| 1920×1080px | Recommended standard | Excellent | ~400-800KB |
| 2560×1440px | Future-proof, retina | Pristine | ~800KB-1.5MB |
From SVGMaker:
- Click "Export"
- Choose PNG format
- Select resolution: 1920×1080px (recommended)
- Download
Optimization:
- Keep file size under 2MB (YouTube limit)
- Use PNG for transparency or text-heavy designs
- Use JPG (90% quality) for photo-heavy thumbnails (smaller file size)
Step 5: Test Thumbnail Readability
Mobile Preview Test
Critical: 70% of YouTube views are on mobile. Test at mobile size.
Method:
- Export thumbnail at 1920×1080px
- Resize display to 160px wide (mobile feed size)
- Can you read the text? If not, increase font size or simplify
Tool: Use YouTube Thumbnail Tester to preview how your thumbnail looks:
- In search results
- In suggested videos
- On mobile devices
- Next to competitors
Design Templates for Common YouTube Niches
Tech Reviews Template
Layout:
- Background: Dark gradient (navy to black)
- Product image: Right side, 40% of frame
- Text: "BEST" or "REVIEW" in bold yellow/white, top left
- Secondary text: Product name, smaller, bottom
- Accent: Neon blue or green highlight around text
SVG Elements:
- Geometric shapes (circles, lines) for tech aesthetic
- Star ratings (SVG icons)
- Arrow or checkmark (SVG graphic)
Tutorial/How-To Template
Layout:
- Background: Bright, solid color or subtle gradient
- Face: Left side, showing surprised/excited expression
- Text: "HOW TO" + action verb, right side, bold
- Icons: SVG step numbers (1, 2, 3) or checkmarks
Color scheme: High contrast (orange/blue, red/white)
Gaming Template
Layout:
- Background: Dark with vibrant accent color (neon green, purple, cyan)
- Character/gameplay: Center or left, large
- Text: Game title or action, top, bold italic font
- Explosive elements: SVG bursts, stars, action lines
Font: Bold, impactful (Bebas Neue, Impact)
Vlog/Lifestyle Template
Layout:
- Background: Soft gradient (pastel or warm tones)
- Face: Center, large, showing clear emotion
- Text: Question or statement, top or bottom, playful font
- Decorative elements: SVG doodles, stars, hearts
Color scheme: Warm and inviting (coral, peach, soft pink)
Workflow: From Idea to Published Thumbnail (15 Minutes)
Step 1: Concept (2 minutes)
- What's the video hook/main point?
- What emotion should thumbnail convey?
- Face or no face?
Step 2: Design (8 minutes)
- Open SVGMaker
- Generate background elements with AI
- Add text (2-4 words, bold, high contrast)
- Import face/photo if needed
- Arrange using rule of thirds
Step 3: Export (2 minutes)
- Export as PNG, 1920×1080px
- Optimize file size (compress if over 2MB)
- Save master SVG file for future edits
Step 4: Test (2 minutes)
- Preview at mobile size (160px wide)
- Check text readability
- Verify colors pop in suggested videos layout
Step 5: Upload (1 minute)
- YouTube Studio → Video → Custom Thumbnail → Upload PNG
Total time: 15 minutes for professional-quality thumbnail
Quick Reference Checklist
Before uploading your thumbnail:
- Resolution: 1920×1080px PNG
- File size: Under 2MB
- Text: 2-4 words maximum, 100pt+ font
- Contrast: High contrast between text and background
- Readability: Text legible at 160px width (mobile size)
- Face: Clear emotion, eye contact with camera (if using face)
- Branding: Consistent with other channel thumbnails
- Colors: High saturation, complementary color scheme
- Focal point: One primary element (face or object)
- Accuracy: Thumbnail represents actual video content
- Uniqueness: Stands out from competitor thumbnails in niche
Frequently Asked Questions
1. Can I upload SVG files directly to YouTube?
No. YouTube only accepts JPG, PNG, GIF, or BMP formats for thumbnails. However, designing in SVG first gives you a scalable master file that you export as PNG. This workflow provides maximum flexibility for future edits and multi-platform use.
2. What's the best thumbnail size for YouTube in 2026?
Minimum: 1280×720px (required by YouTube) Recommended: 1920×1080px (crisp on all devices) Future-proof: 2560×1440px (4K-ready, retina displays)
Always maintain a 16:9 aspect ratio. Export as PNG for best quality, keeping file size under 2MB.
3. Should I use my face in thumbnails?
Data shows: Thumbnails with faces get 12-18% higher CTR on average. However, it depends on your niche:
Use faces for: Vlogs, tutorials, personal brand channels, reaction videos
Skip faces for: Ambient music, screencasts, nature documentaries, some tech reviews
Best practice: Test both with A/B testing and use data to decide.
4. How many words should thumbnail text have?
Maximum: 4 words. Ideally 2-3 words.
Why: Viewers scan thumbnails in under 1 second. Long text is unreadable at small sizes (mobile feed).
5. What colors get the most clicks?
Highest CTR colors:
- High contrast combinations: White text on black, black text on yellow
- Complementary pairs: Orange/blue, red/green, purple/yellow
- Vibrant single colors: Bright red, electric blue, neon green
Avoid: Muted colors, low contrast (gray on white), too many colors (visual noise)
Pro tip: Check competitors' thumbnails in your niche. Use colors that stand out in that context.
6. Can I change my thumbnail after uploading?
Yes! YouTube allows thumbnail changes anytime. This enables A/B testing:
- Upload video with Thumbnail A
- Monitor CTR for 1-2 weeks
- Change to Thumbnail B
- Compare CTR data
- Keep the winner
Note: Changing thumbnails too frequently can confuse viewers. Test strategically, not randomly.